|
|
|
|
Nov. 2010
April 2013
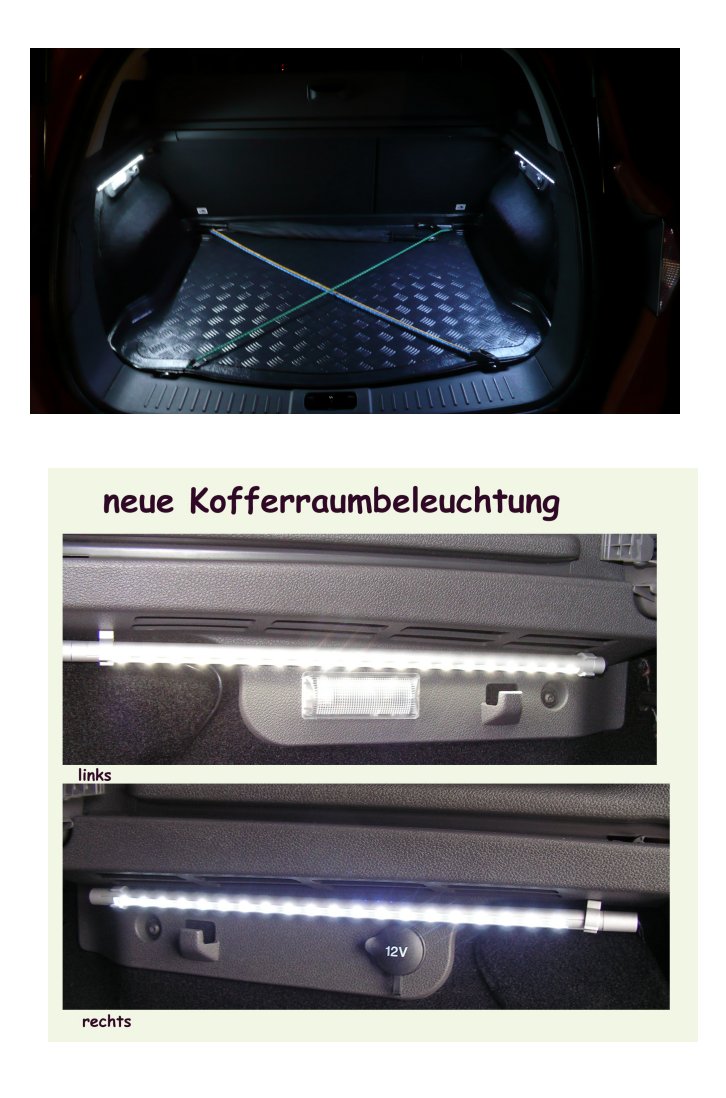
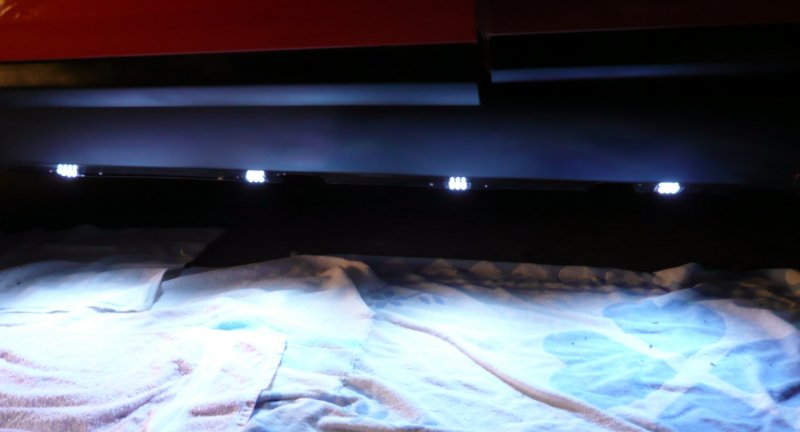
1. Light up your trunk February 2012
Here the modification instructions:
I disconnected the small light on the left and used it as connection piont fort he LEDs. The 12V aluminum LEDs are equipped with 20 x 5mm top-LEDs and gives you due to the wide angel light-emittance a very homogeneous light. Furtheron they are turnable within the brackets and can be fitted as you please.
The bar is fixed with 2 very small clips, which are mounted on each side beneath the trunk-cover.
Electricity supply comes from the original lamp. Fumble the cable from the right side to the left as you please. You can hide the cable anywhere you wish.
Estimated time 30-45 minutes.
Picture 1 + 2 show the mounted LED-bar. The supply cable is somewhat moved out just for showing it on the picture.
You can purchase the bars here
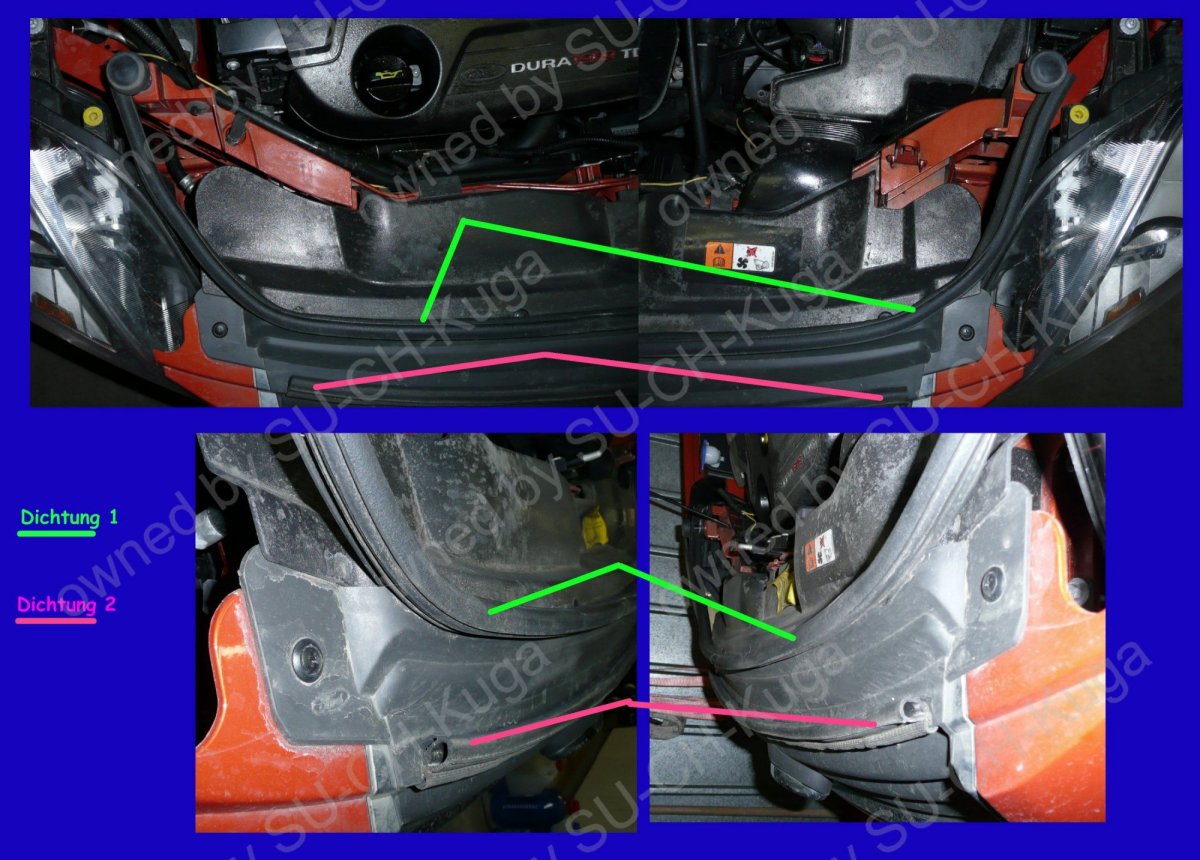
2. Keep your engine compartment clean March 2012
In order to keep your engine compartment clen just mount a door seal above the cooler from one headlight to the other.
I had some seal left and fitted it rigt in front of the first. Now I don't have a shimmying hood but a clean engine.
In case of an accident the door seals are still ok, therefore I got me those from a junk yard, didn't cost anything except one questioin. Estimated time to mount: 15-30 minutes
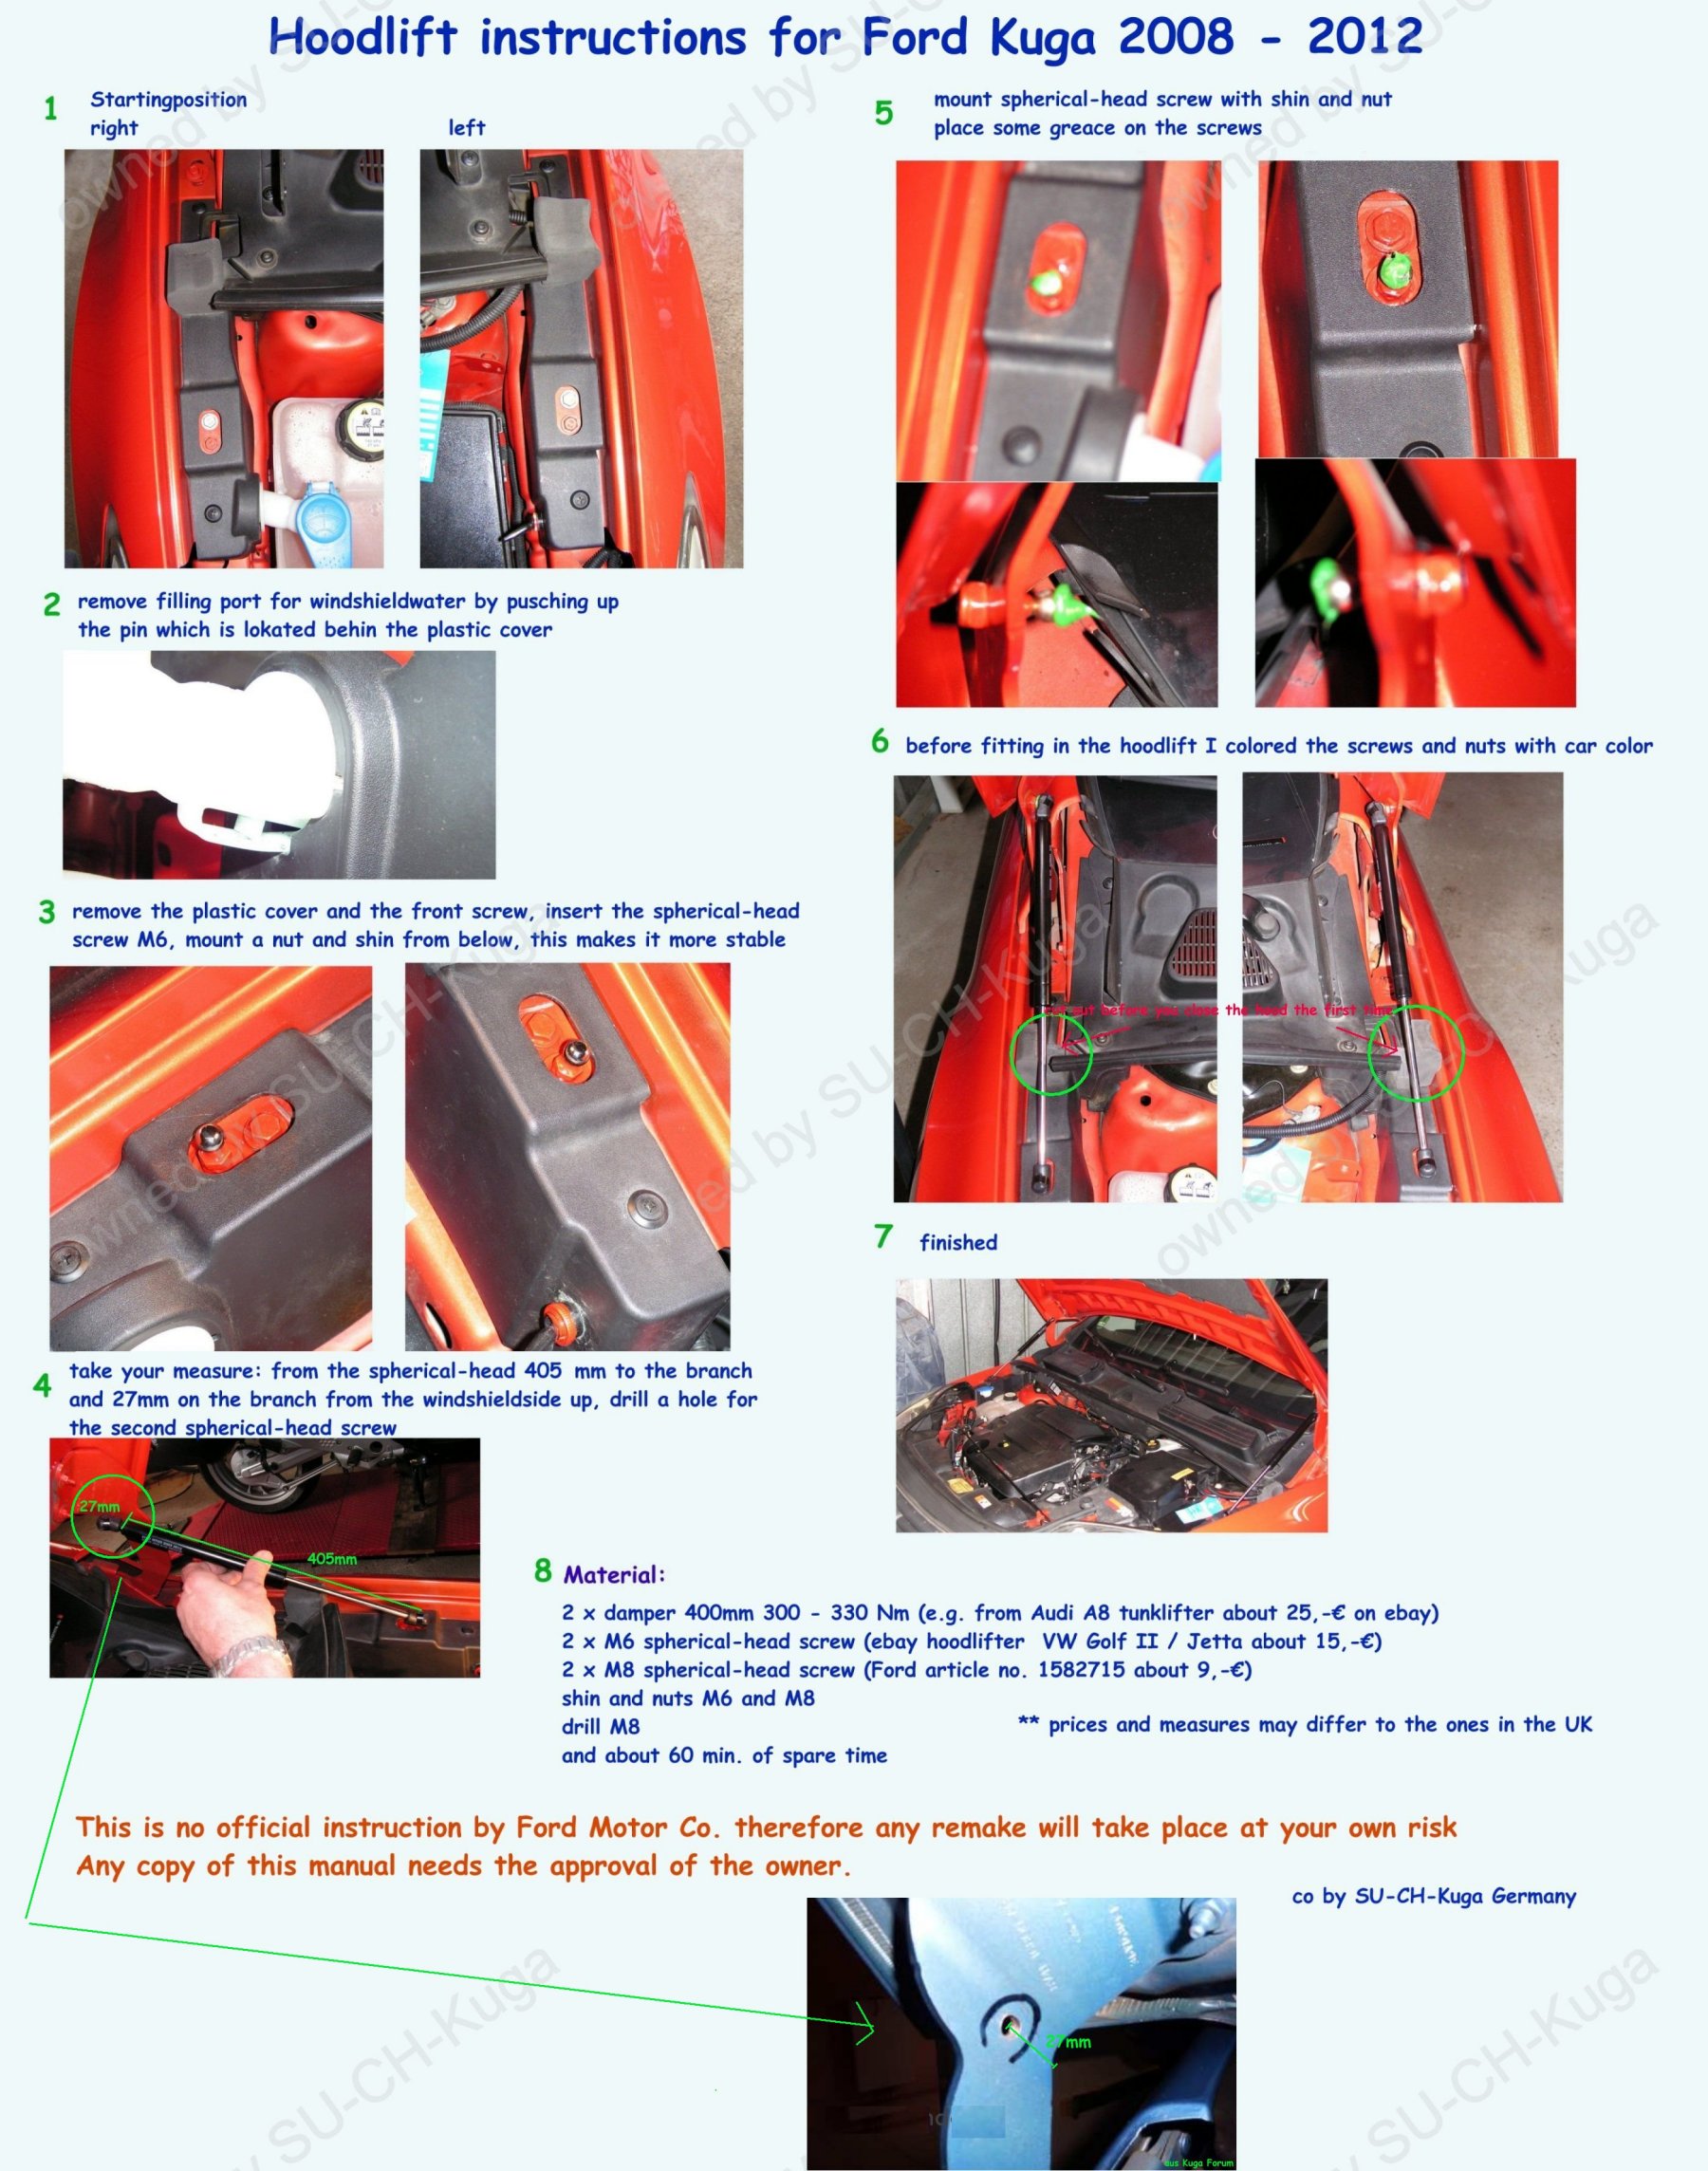
3. hoodlifter May 2012
I didn't like to stick in the hoodholder everytime I open my hood. Therefore I read and searched a lillte and finaly I came up with this hoddlifter
The installation took about 60 minutes and it looks great. See for you self:
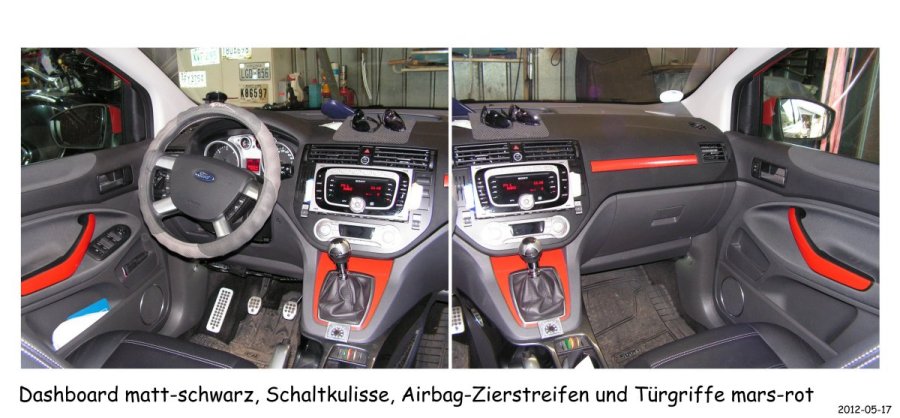
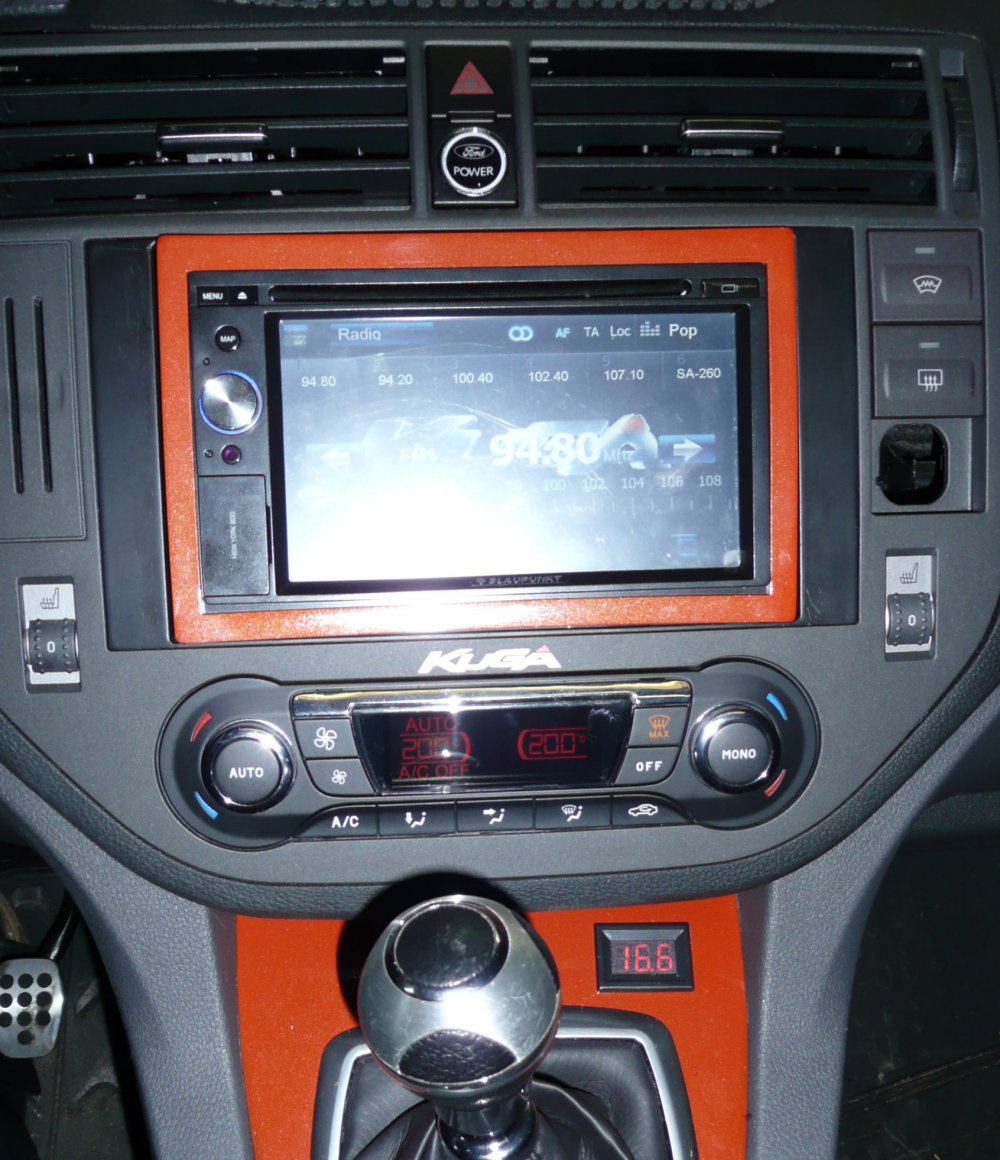
4. Colorful interior
The actual Ford interior styling is somewhat boring bi-colored. I changed that with the very trendy body-color, now I realy have some life inside:
Starting out here:
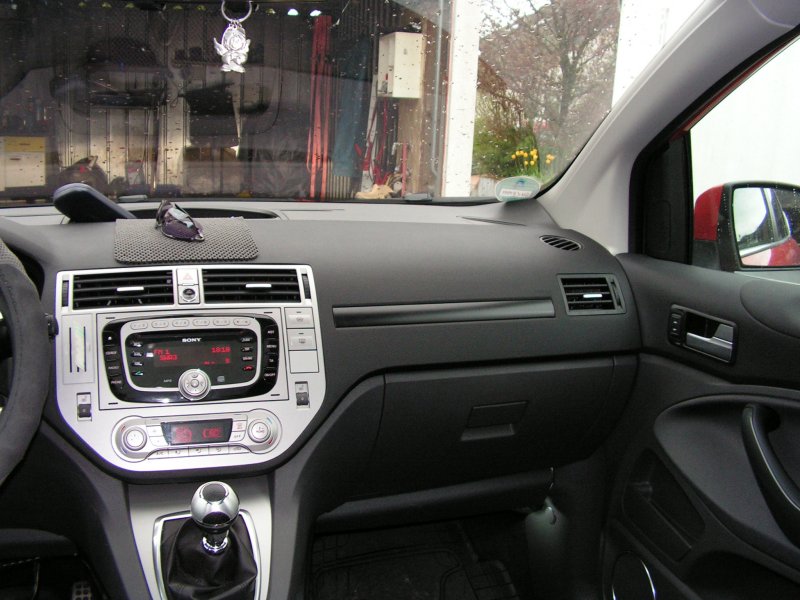
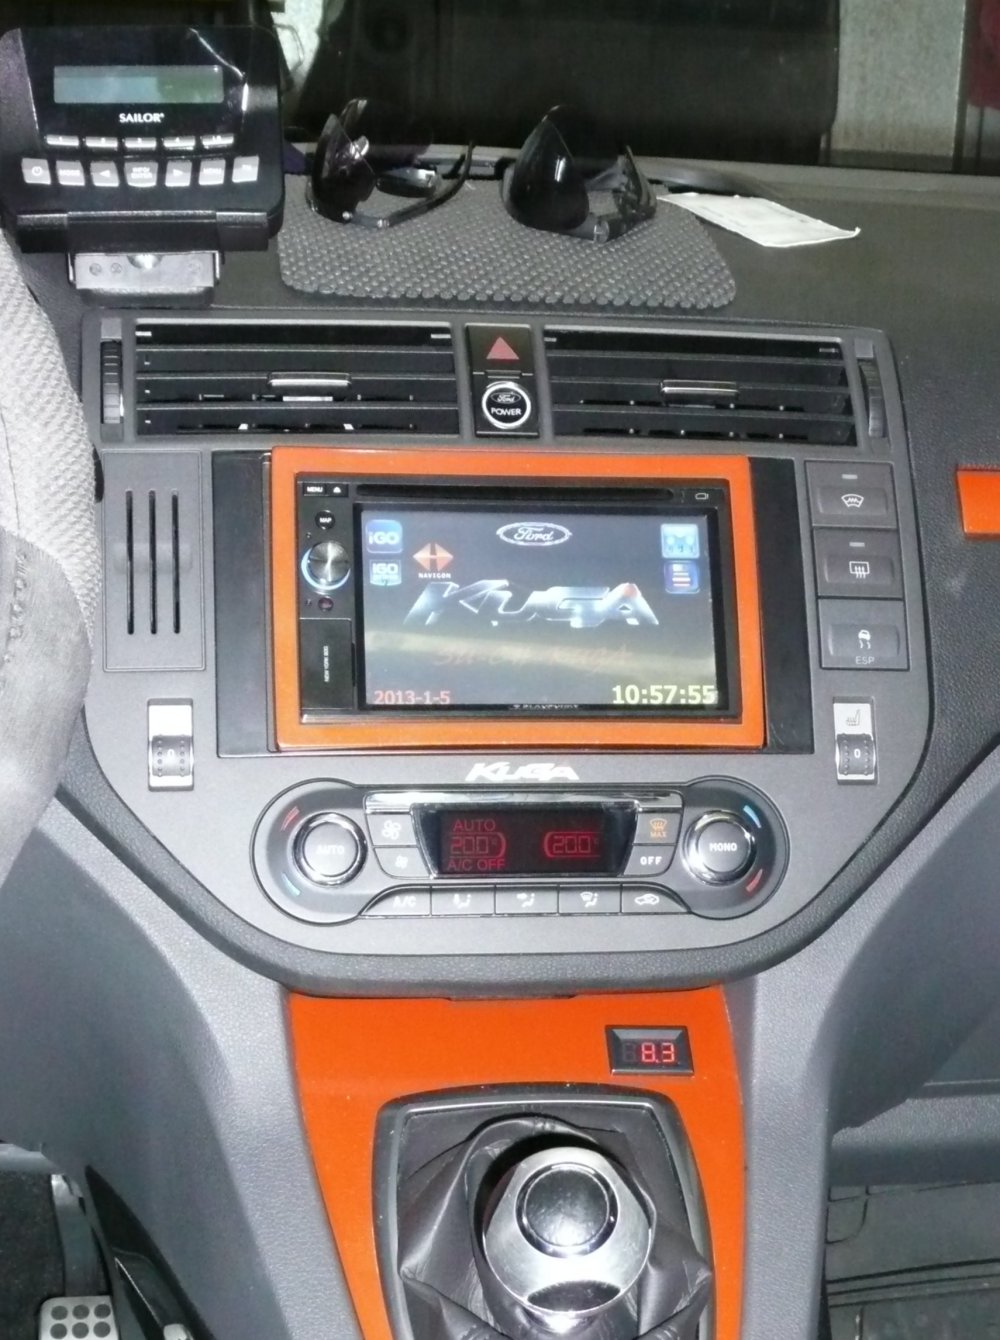
I took out the radio frame and colored it black, took out the door handles and the smal stripe on top of the airbag and the
frame for the stick shift and gave them the body color of the car mars-red. After that I also installed a Blaupunkt New York 800 including
an rear view-camera and put all of it back together:
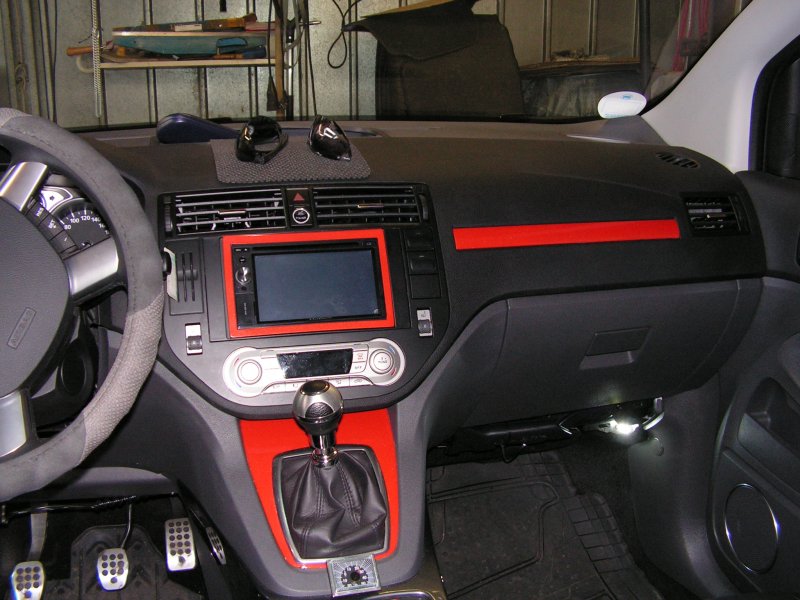 new Blaupunkt New York 800 radio with black radio frame new Blaupunkt New York 800 radio with black radio frame
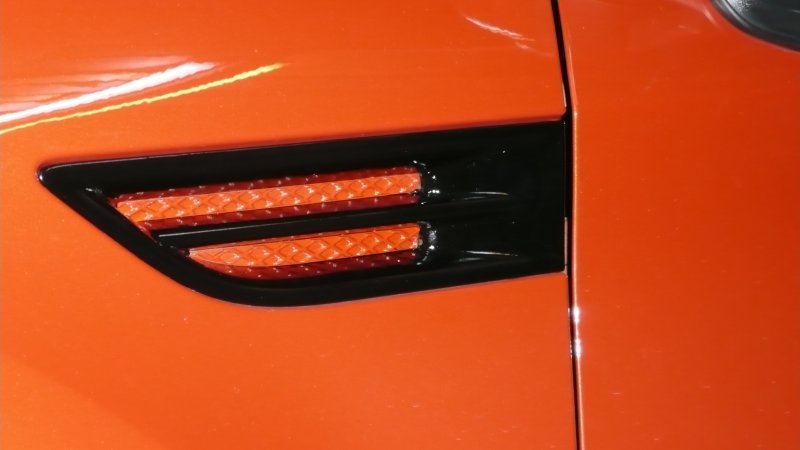
5. Colorful exterior
My last challenge was to set some exterior color accents. Here you are:

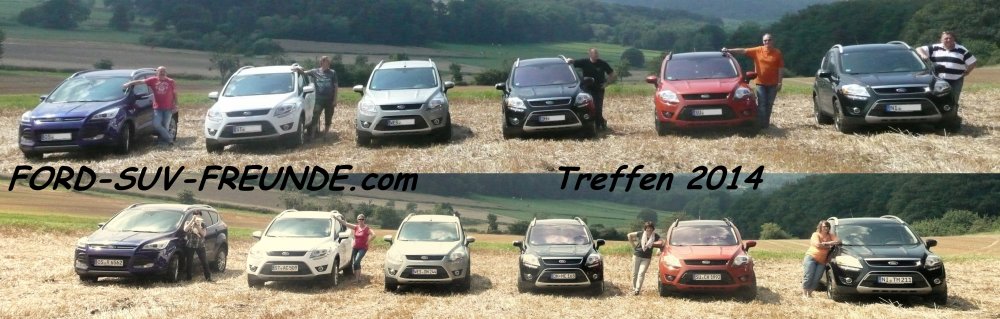
6. Second International Kuga Treffen Germany
You didnt attend at the FORD-SUV-Treffen Germany? Or just didnt have time?
Have a 5 minutes look here
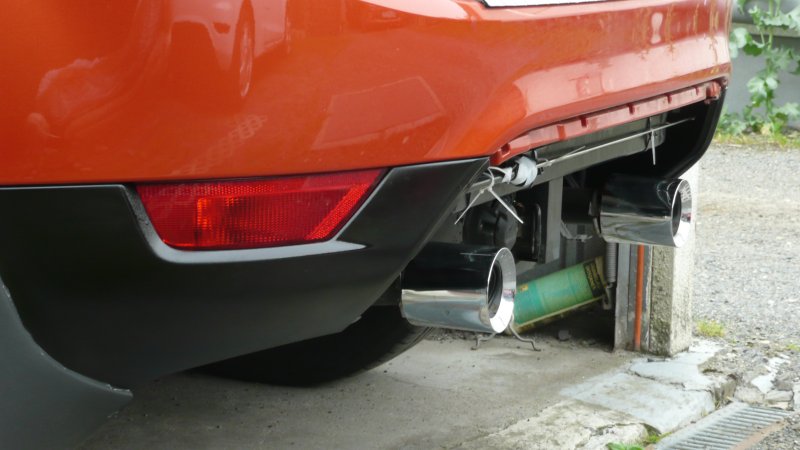
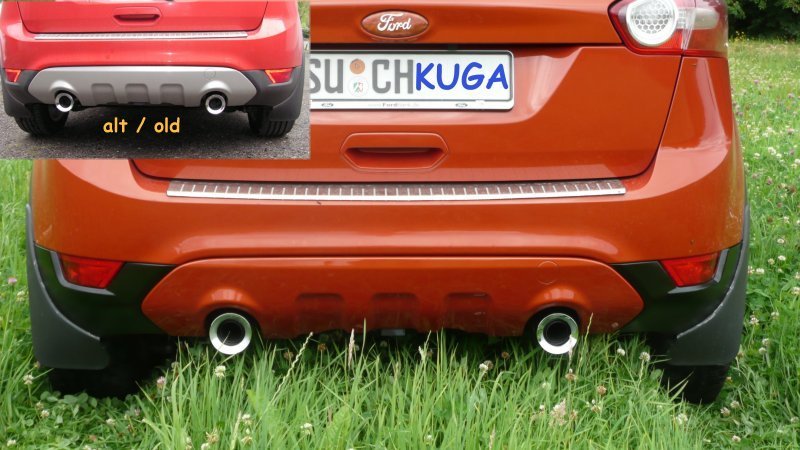
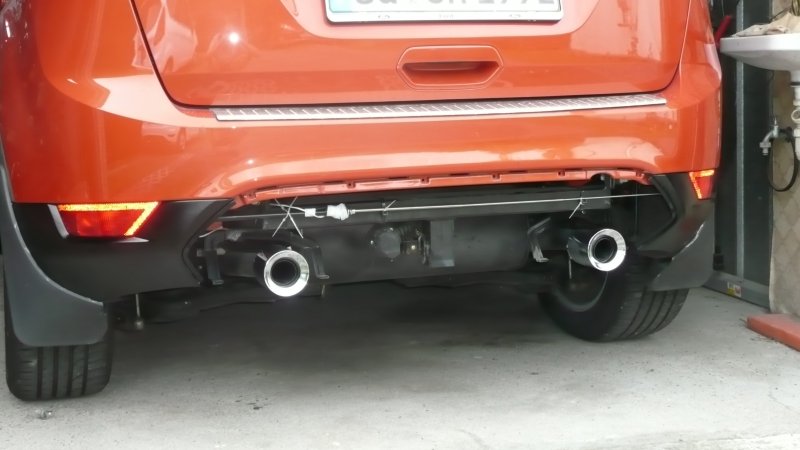
7. Tajco 4224 end-pipes March 2011
To gain a much better look on the back of the kuga, I mounted Tajco 4224 end-pipes. To make them fit I had to make 2 cuts on the inner layer, then I took a soft hammer, that's all. You dont have to take anything off from the original, just put some black paint on the shining center and it looks as if they were original.
8. using more than one navigation software on a Micro-SD July - August 2012
I'm using a Blaupunkt NewYork 800 radio in my Kuga, I took out my original Sony Sound&Connect due to the missing navigation system.
Further I added a rear-view camera to have a better view when I hook up my trailer. Now having 3 useable softwares, I often had to change the SD-card.
This I didn't want, there fore I have been looking for some software in order to have all 3 navi-sw on my SD and change the software by
pushing a button. After some experiments I found the solution. You can download it here.
mult_Navi-SW1.rar
You are able to use numerable softwares with just one SD-Card. It's every easy to use. Here a screen-shot

It also gives the opotunity to use a calculator and the TotalCommander right from the surface. At the bottom you find the date and a clock.
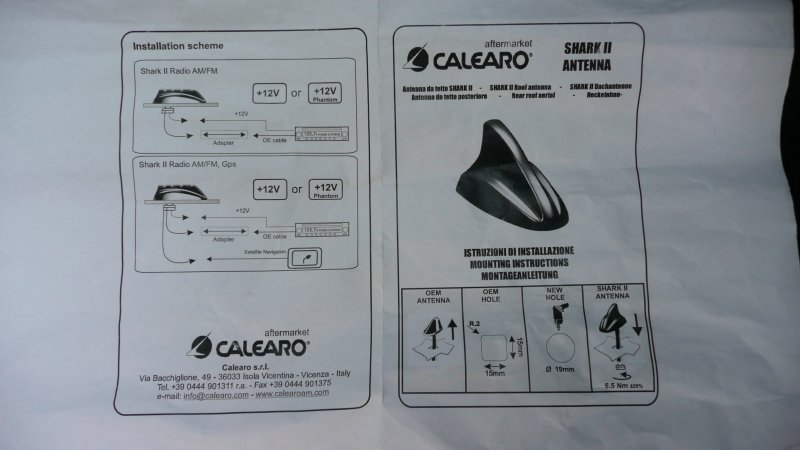
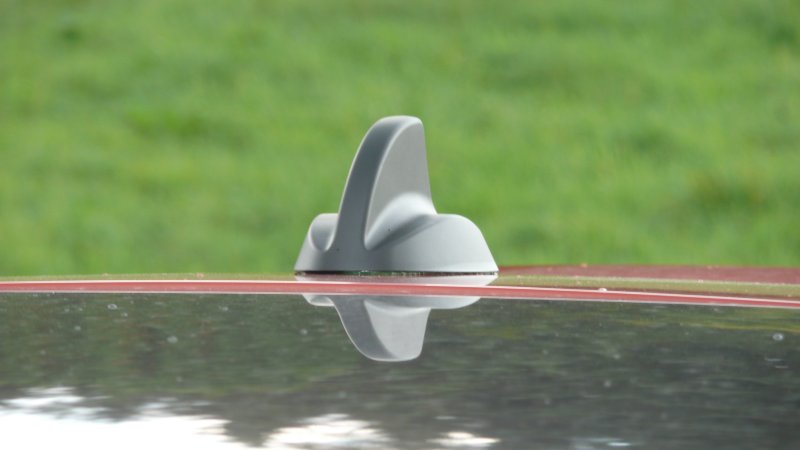
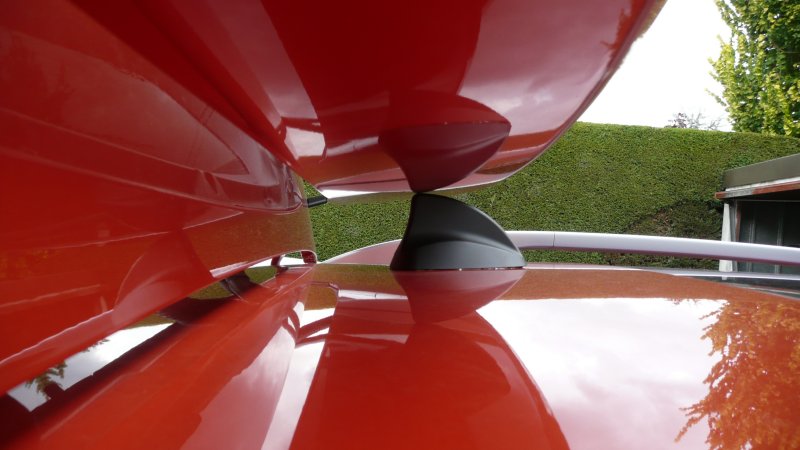
9. Mounting a Shark Antenna on the back roof June 2012
Many friends do have a shark antenna on their cars. That realy looks great. therefore I would like to have one too. Before I've been experimenting
with longer, shorter and thicke antenna masts, but the result was not that what I expected.This morning I stopped nest to a car radio shop, well I
got in and got out, with a Calearo Shark II Antenna in my hands.
Nowhow do I mount the new one? Its very easy, first remove the covers on the right and left on the D-pillar then the same on the C-pillar (2 screws. Then
you should remove the hand gripps above the back doors in order not to get a knick in the heaven. At last you pull down the two knobs in the heaven near
the tailgate. Now slowly pull down the heaven. Remove the original antenna by ckicking off the antenna and + cable and after unloosing the screw move the
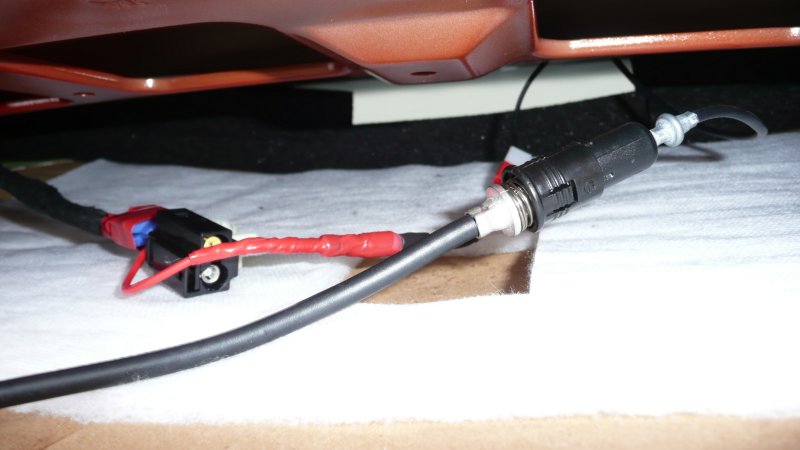
antenna out of the roof. Now its time to provide an adapter for the + cable and to install the antenna cable down the D-pillarandthan all the way to the radio.
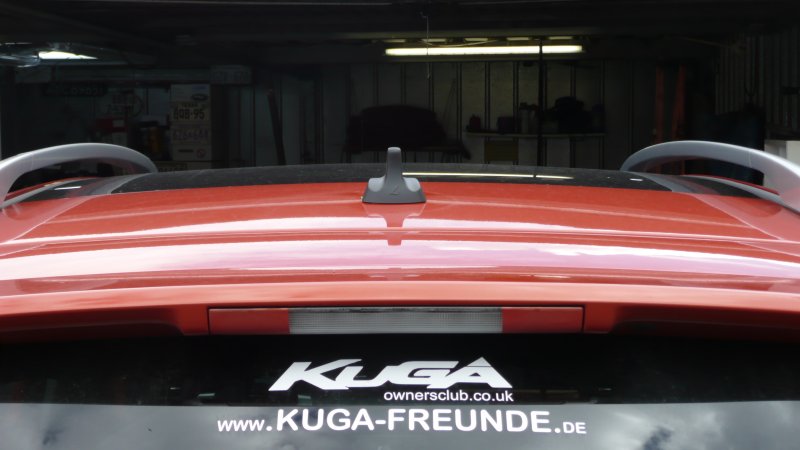
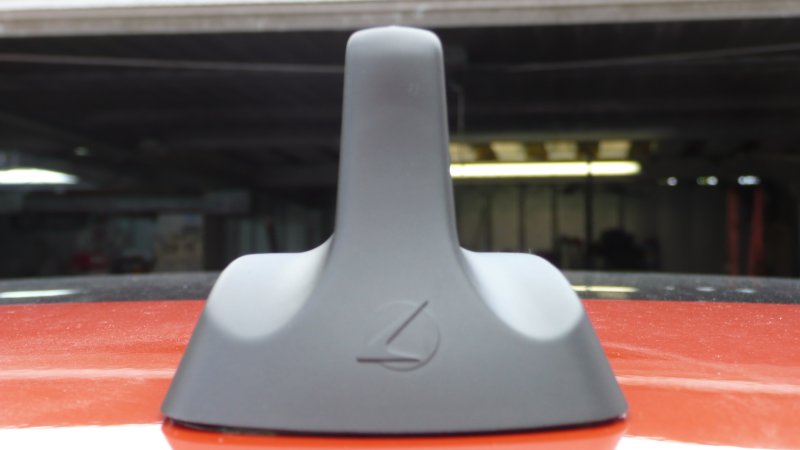
After that's done, insert the shark antenna, tighten the srew very good and connect the + cable as well as the antenna cable. Finished.
Because I already had an antenna cable inbstalled due to my experiments, it took me just about an hour to installthe shark antenna
Here some pictures:

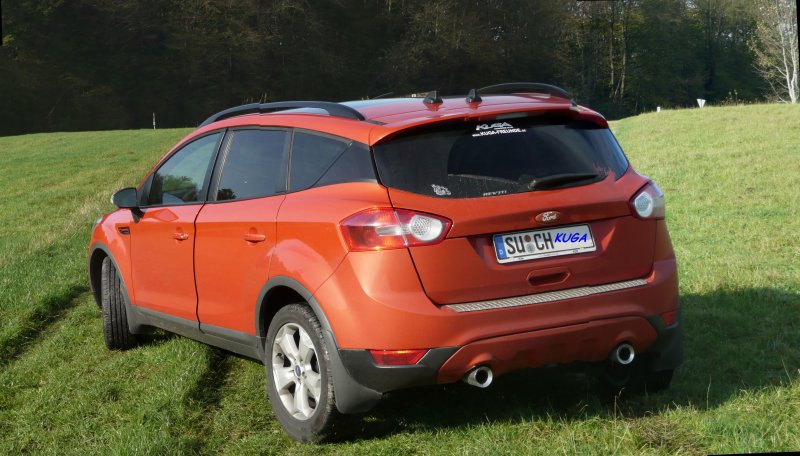
10. back roof rails November - December 2012
I was searching for some black roof rails for my Kuga.
Unfortunately I could'nt find any, neither at the Ford dealership nor in accessories shops. Well, no problem I thought, I had the
assembly instructions, so searched for the insrtutions and read, hmm hmm, ah! Here, wow this can't be that difficult, just dismount
the front and rear plastic caps and then unscrew the rail. By the way: the Kuga is the only Ford having the Rail mounted fromt top!
Oooh well, removing the caps is a true challenge. Quite honestly, I didn't get them off. Because I dont want to damage the caps
I paid two Ford dealers a challenging visit. However, both could not guarantee to get the plastic parts off without any damage. Well, then
I just buy 4 new caps, can't cost the world. But, typicly Ford, you can't buy the caps without buying the rails!!
To make it short, I left the rails mounted and covered the car with newspapers. Didn't know that the Kuga has such a huge surface!!
And then I varnished matt black and covered with matt varnish afterwards.
And as we where lacquering, I have also blackened my chrome brackets on both side beneath the windows. Now I have black chrome brackets.
I believe the result is realy good
Here some pictures:
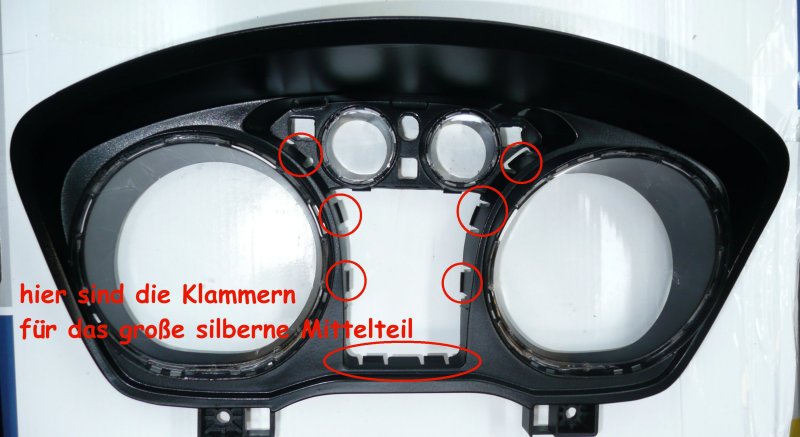
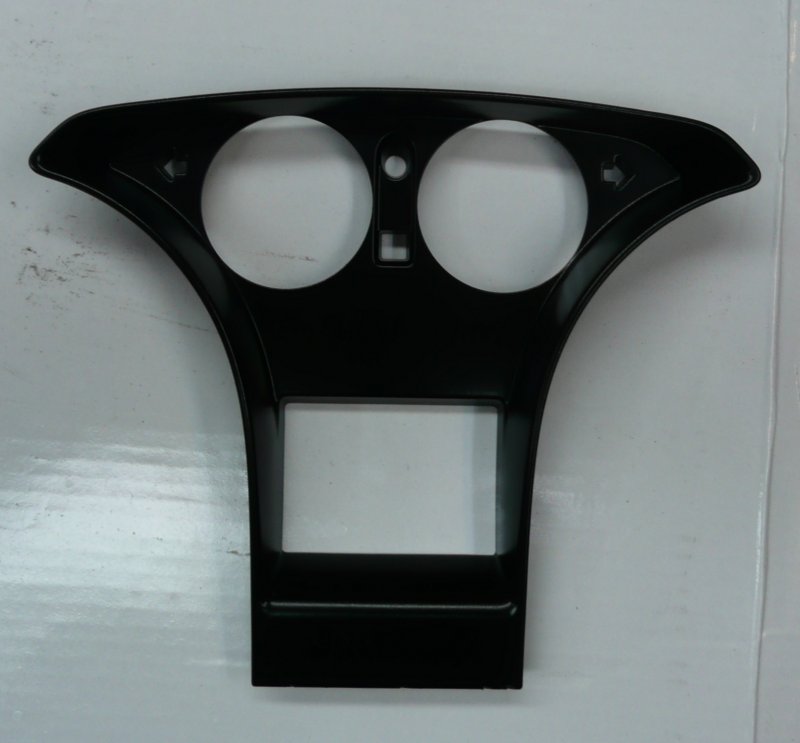
11. Lacquerwork at the speedometer unit November 2012
After already quite a lot in the vehicle got some black paint, I have beein irritated by the big silver center section in the speedometer
unit. I also would like to have the matt silver rings in chrome. So far to the starting position
The removal of the speedometer unit is rather simple. At the bottom of the unit you find 2 Torx screws, remove these and press the unit at
the top carefully down and forwards to you. Then unplug the jack and the speedometer has come off. Now clip off 3 clips on the upper side
and 2 at the bottom. Now you should have 2 parts in your hands: the electronic unit and the frame. The rings can be simply drawn off upwards.
The silver middle section must be cliped off at the back.
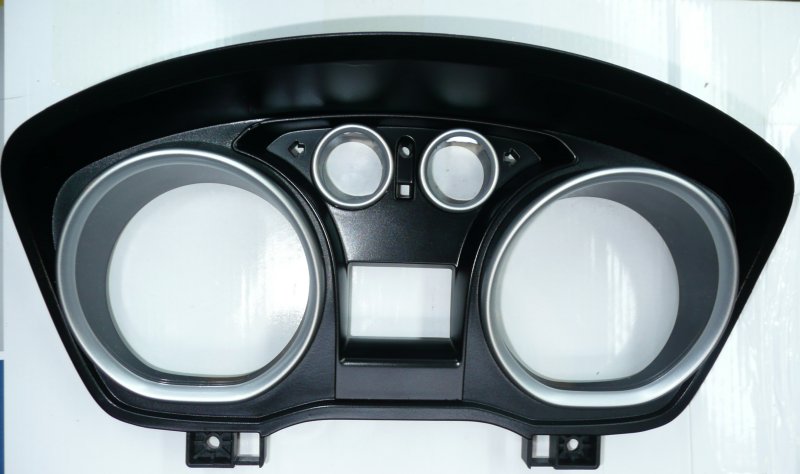
Now I varnished the parts matt black and laid a layer matt lacquer over it. I have not covered the rings with chrome from the tin at last.
The reason for this is that they would still look silver and not chrome. Besides, a layer lacquer would 'damage' the chrome again and also
not given is the durability, the wear firmness. So I just covered the rings merely with brilliant varnish.Before reassembling all parts, I added
for my car the Kuga sticker with the red topped A and my nick-name to the speedometer
So and now you fit everything together in reverse order. Finished
Here the pics:

12. D-Pillar January 2013
You certainly know the current Land Rover Evoque. As of my opinion, visually very well done. Especially with the white bodycolor and its darkened
rear-windows it looks -at least for me- very nice. After some consideration, I found a solution for my Kuga: the D-Pillar will be black, at least
partially. In order to figgure out how it would look like I taped one side with black duct tape.
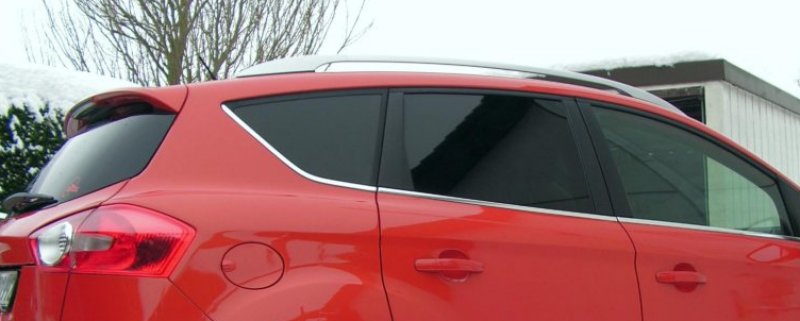
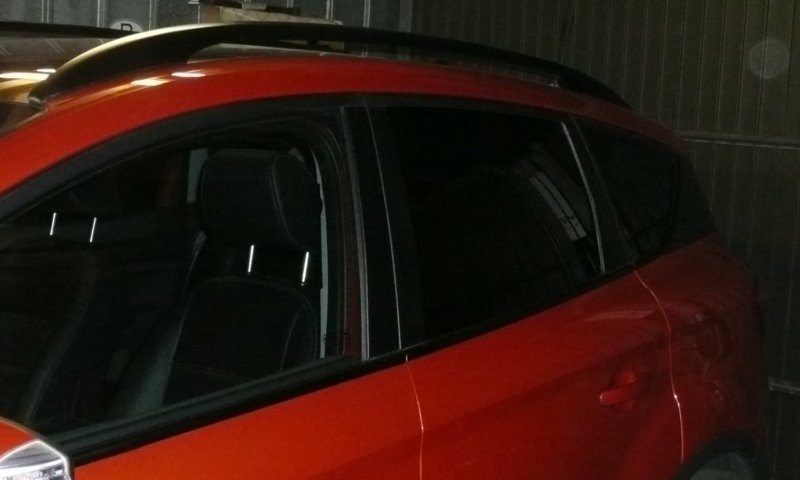
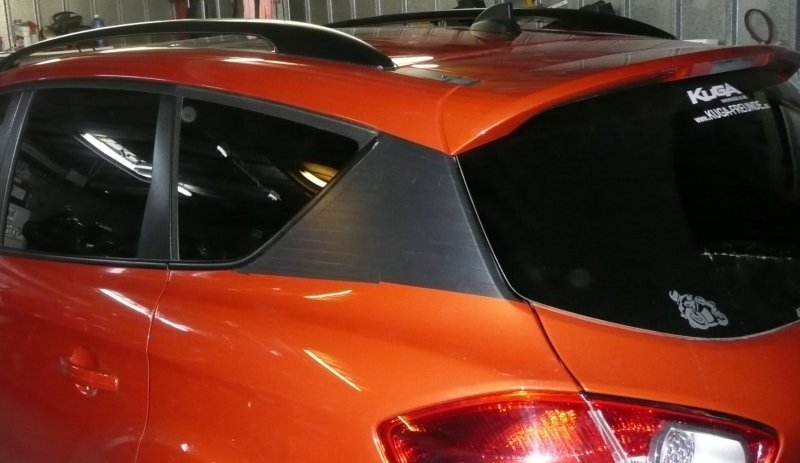
A couple of days I drove with the test tape to gather some opinions. Some argued it would look pretty good and also it would make the Kuga
look slightly longer and larger. A few others just couldn't find it 'somehow' positive. Because it pleases me I had to fish or cut bait and so I
colored both sides and got a black D-pillar. I think that the result aint that bad:

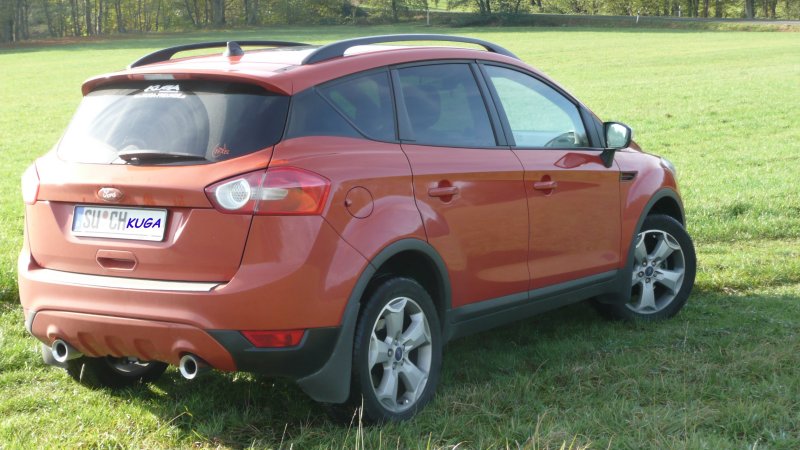
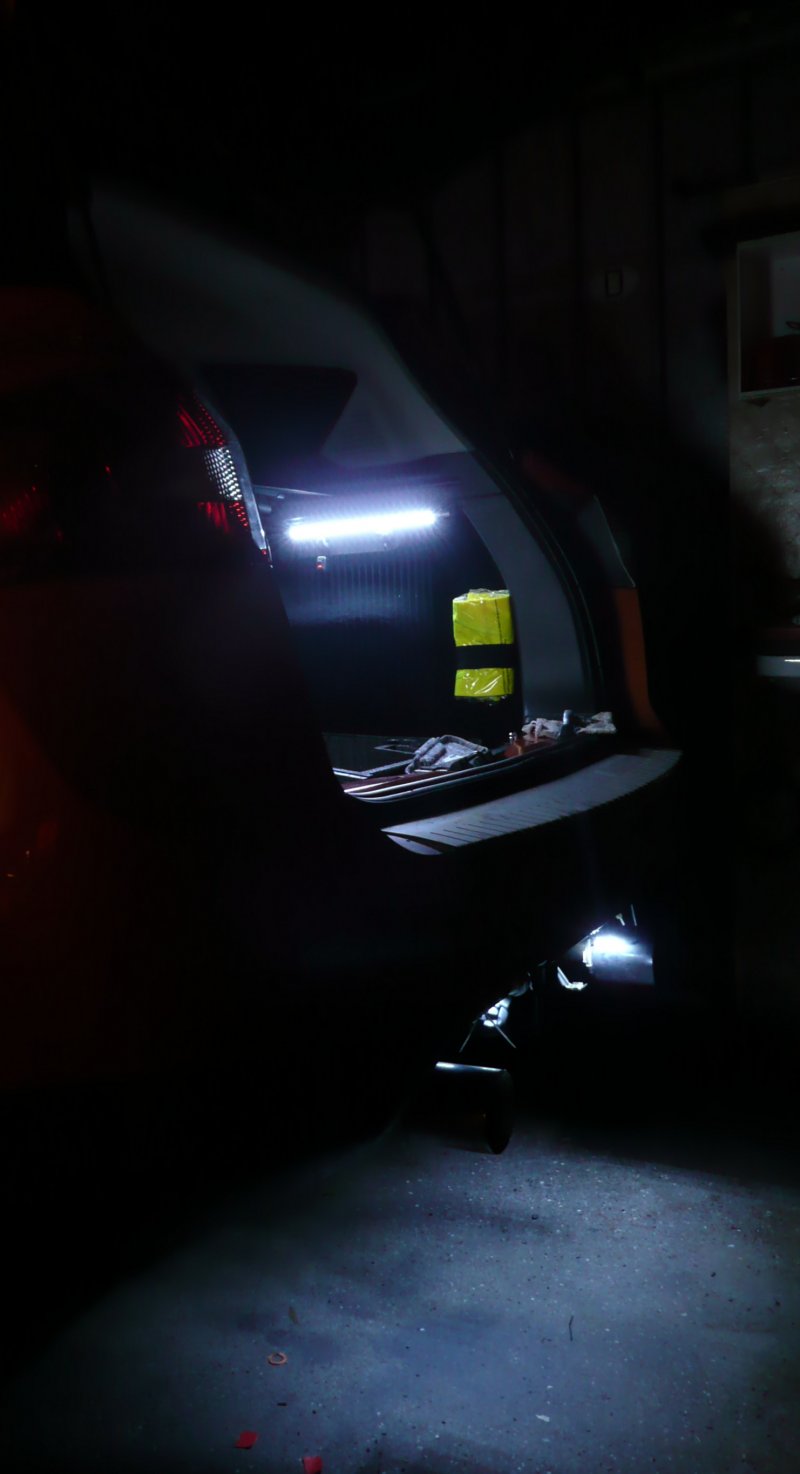
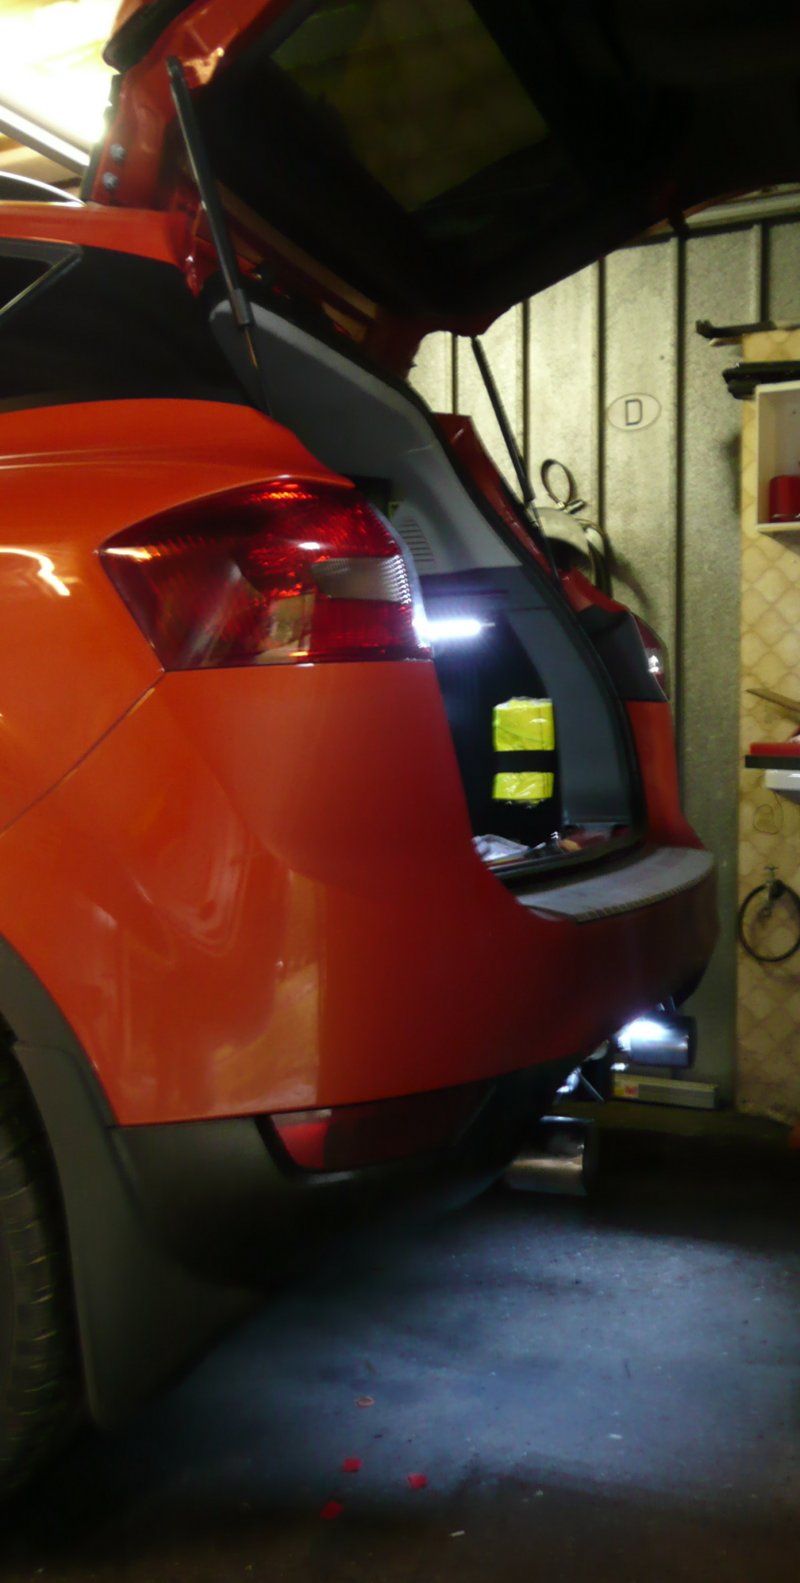
13. Trunk underbody lights March 2012
Certainly this already happened to one or the other, especially in the dark winter months. You are shopping and coming back to
the car with a full caddy / trolley. You open your trunk and start loading your grocery into the car. Then it happens: an item
drops down and you start searching where the hell it rolled or tumbled.
I've now put an end to this. I still had some LEDs in the garage. After some minutes of reflecting where to place them, I glued
them to the underside of the trailer coupling. The power connection was laid through the rubber seal on the left side of the wheel
well to the inside where I connected the cables of the trunk lighting. Now the rear environment is lit when I open the tailgate.
This is seams to just gimmick for one or the other, but for me it is useful should something drop down when it's dark. You can see
this mod as an safety aspect because where you have light on the road / parking area, is also a vehicle and due to the lighting
people can be recognised sooner.
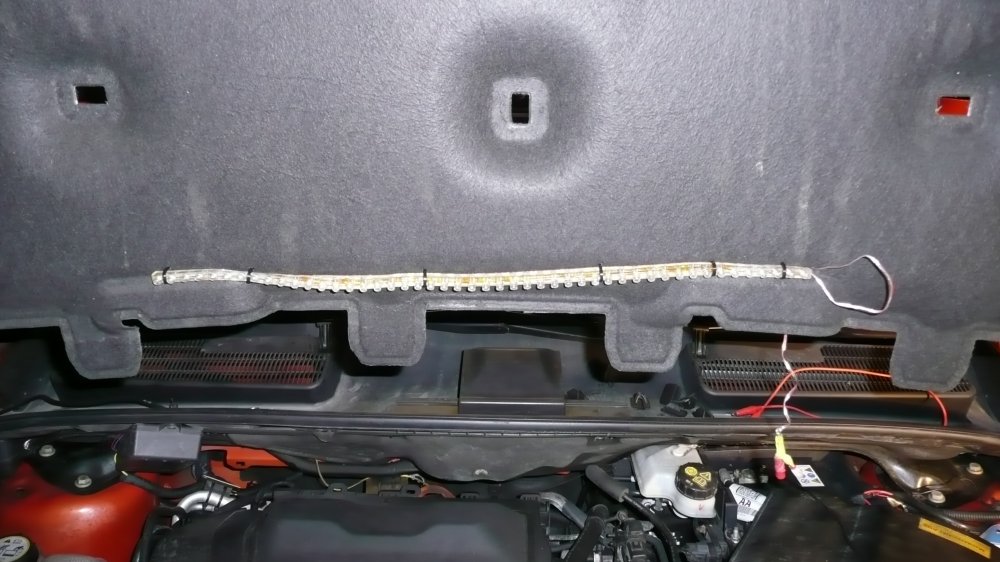
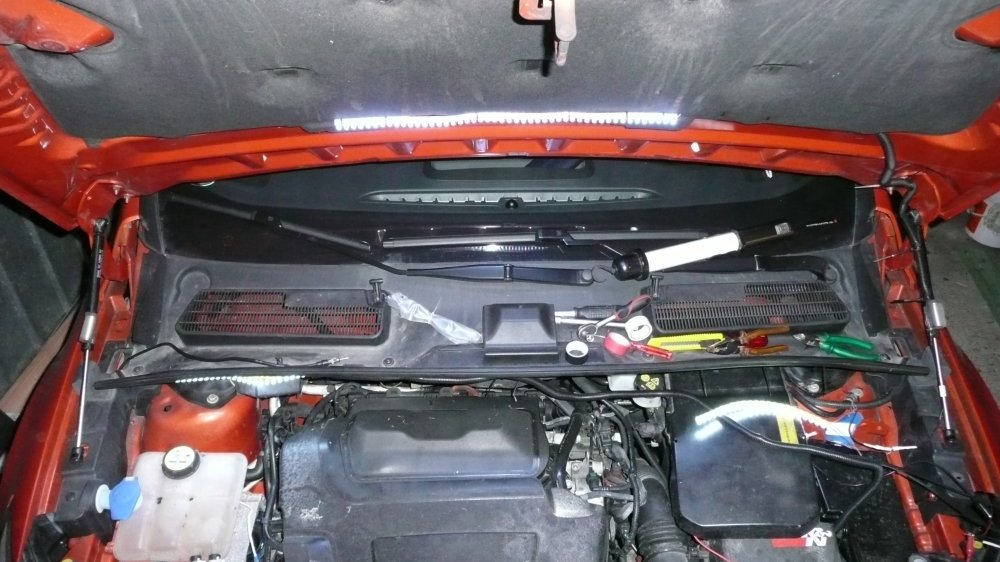
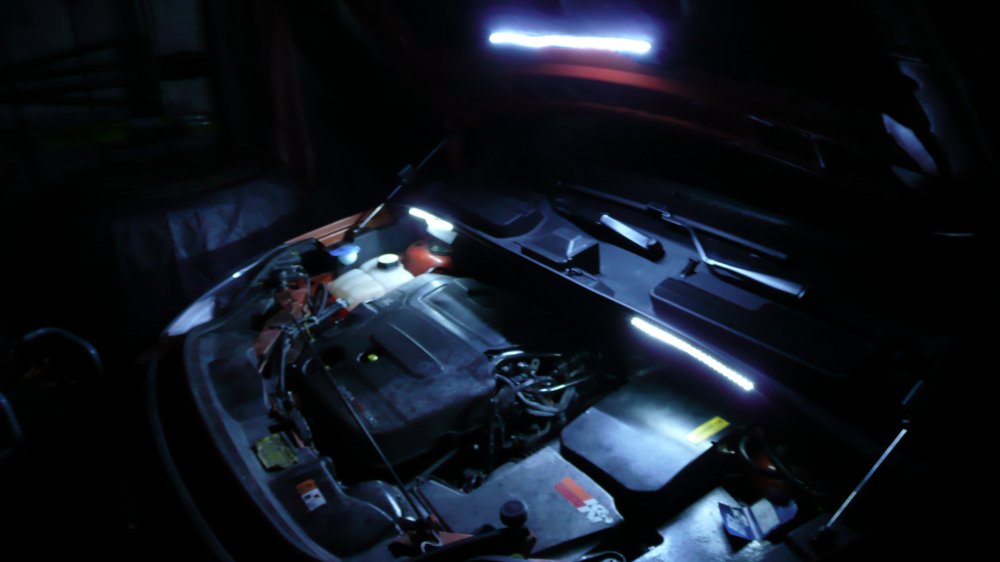
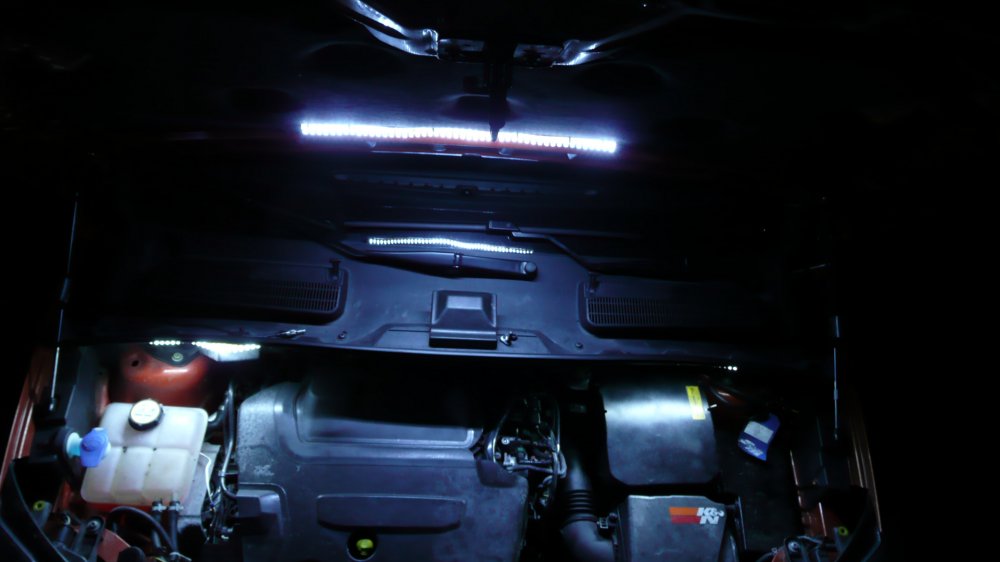
14. illuminated engine compartment April 2012
The dark season. As you drive on the high way you catch a sight on a car standing on the emergency lane or at the parking area with an open
hood. The driver is trying to get something fied with one hand. The other is necessary holding the flasglight, which gives up due to pure maintenace.
We don't need it that often.
Therefore I decided to do something, so this will not happen to me. I must get an illuminated engine compartment! All in all I got 3 watewrproof
LED-stripes. 2 short ones I placed on the right and left of the motorcompartment and the long one I mounted right on the hood to get more light
from above. In order to get the LEDs to light up as I open the hood, I also installed a door contact switch. Now I see whats up even when it's dark.
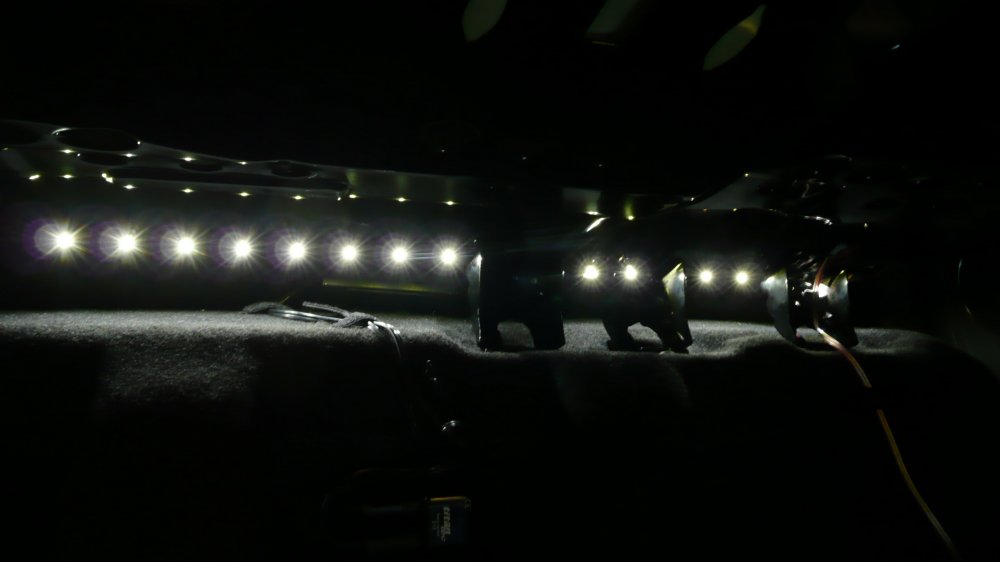
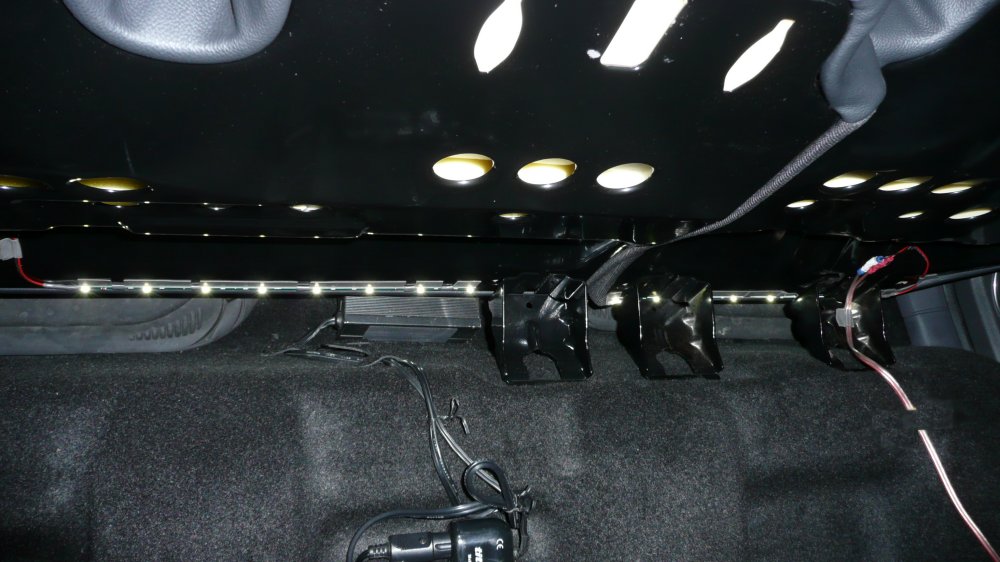
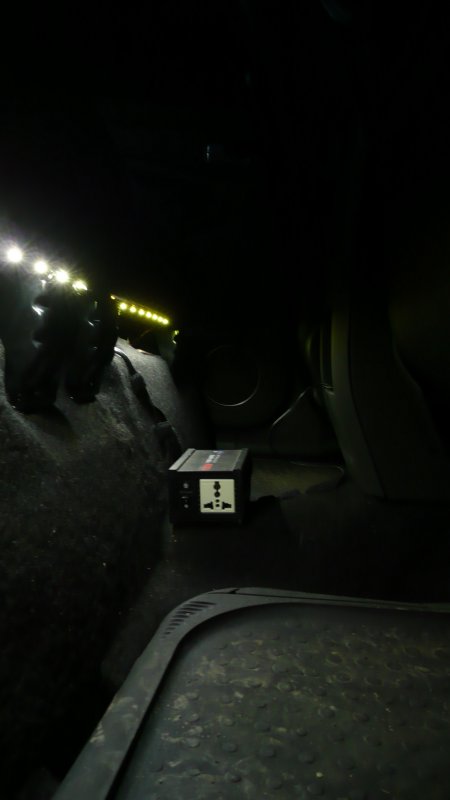
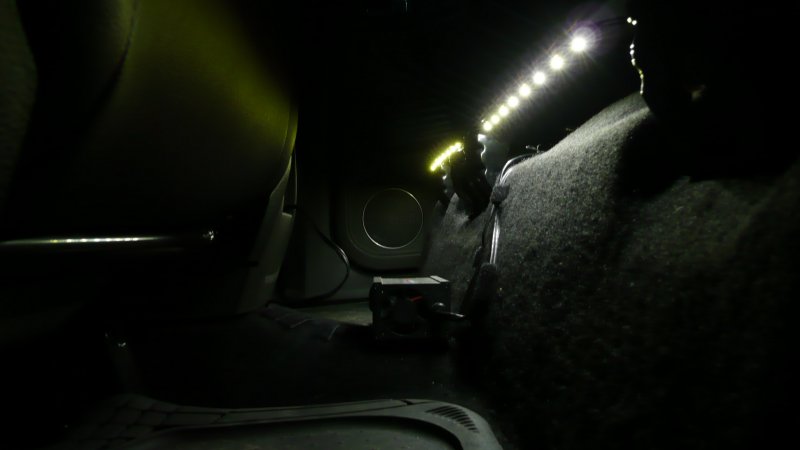
15. illuminated footwell 2nd row February 2013
Just after I got my Kuga in 2010, I changed all inside bulbs to LED. they were very bright and I was happy. A few days ago I found some LED-stripes
and as I saw them, they where already mounted in the front footwell. In my oppinion they gave me a better light performance than the bulbs.
Of short hand I resolved to position a footwell lighting in the 2nd row. Bought another 2 LED-stripes and then I got some doubts for the
assembly. Beneath the front seats?? No, this would be too easy, too simple and if somebody pushes his feet under the seat I possibly have to
amend. This definitely is not my option! Under the rear bench, this would be the answer. After some searching I had the solution in my
hands: Assembly adhesive tape, holds up to 33 kg! So I cleaned the bench below in front and placed a stripe adhesive tape. The LED-stripe on it stuck
and linked them with the interior lighting. Take a look at the result:
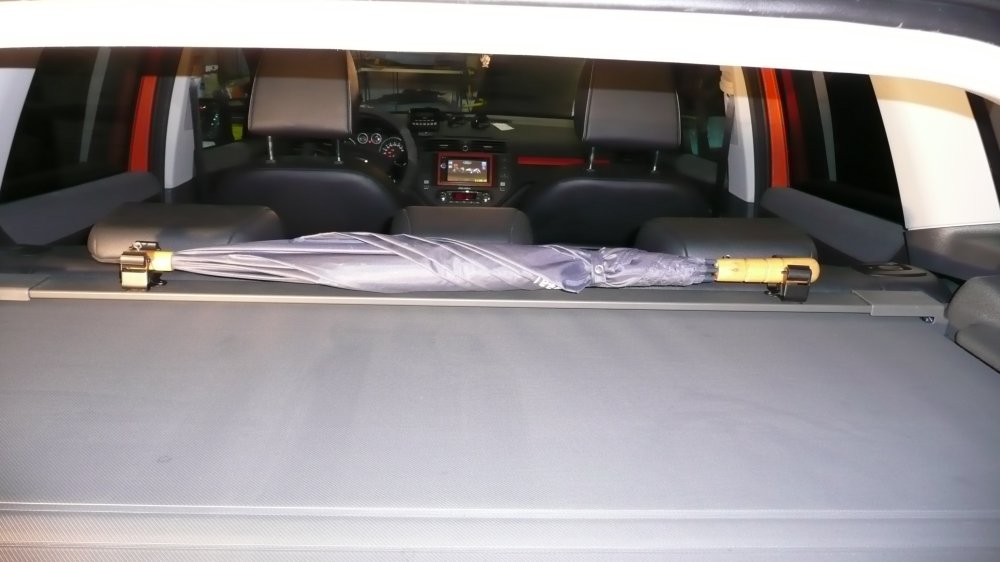
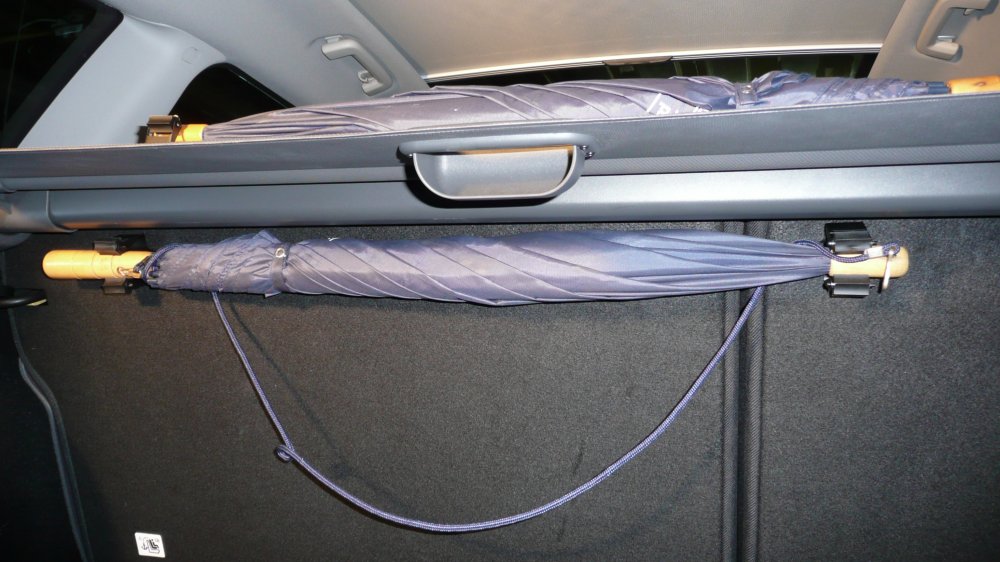
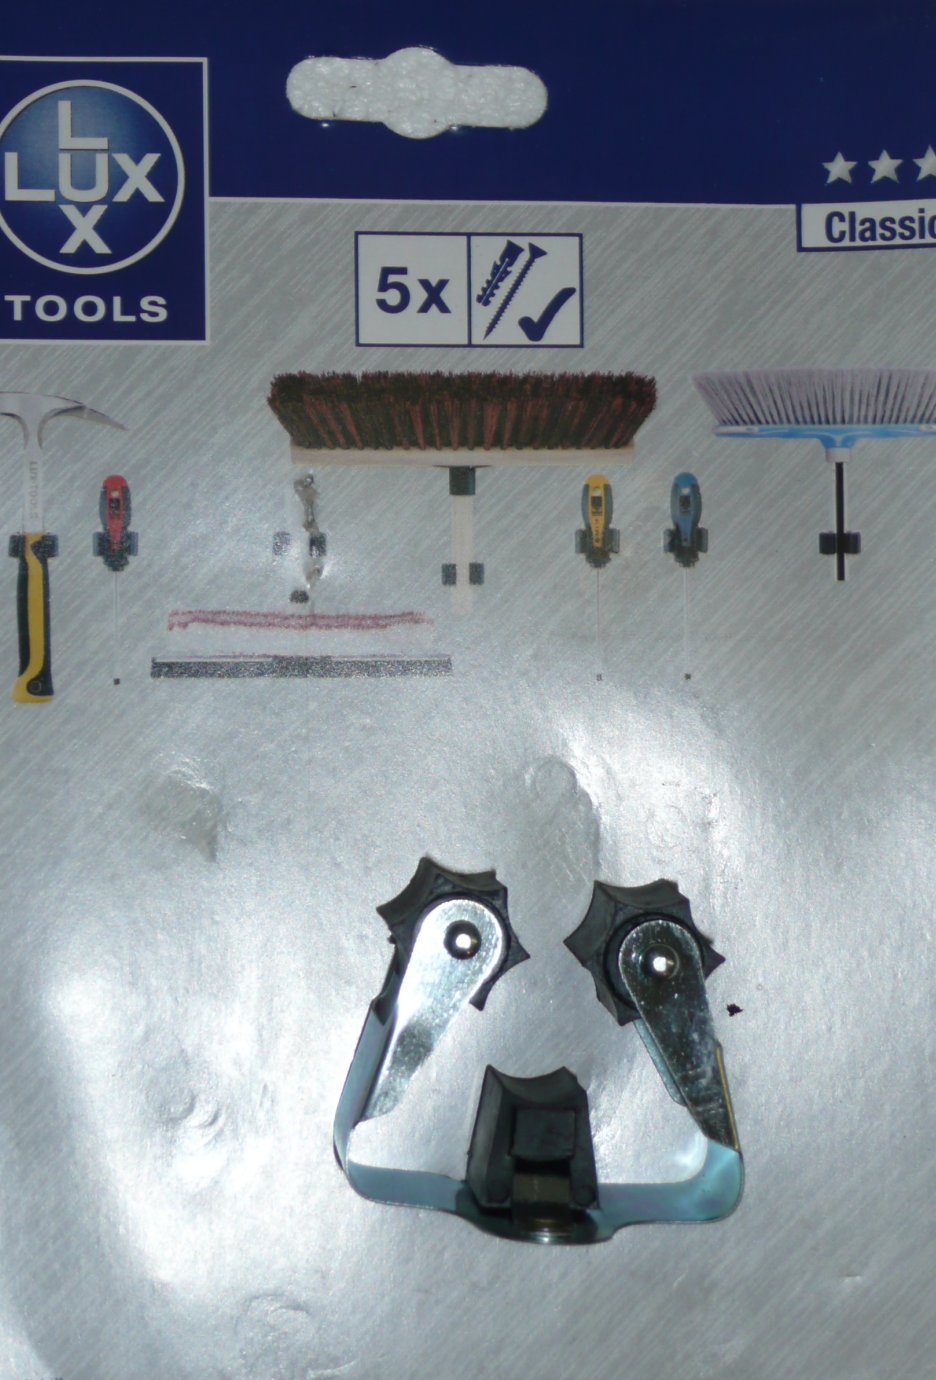
16. umbrella fixtures January 2013
Let us come to the easy things of the life. If the sun shines, everything is great. However, wait until the rain comes!! Damn, where
was the umbrella?? I discovered a solution in the hardware store.
With a package of device holders, you can establish 2 umbrella fixtures at once. With some velcro-tape on the shade and one more in the
luggage space, the umbrella is handy any time.
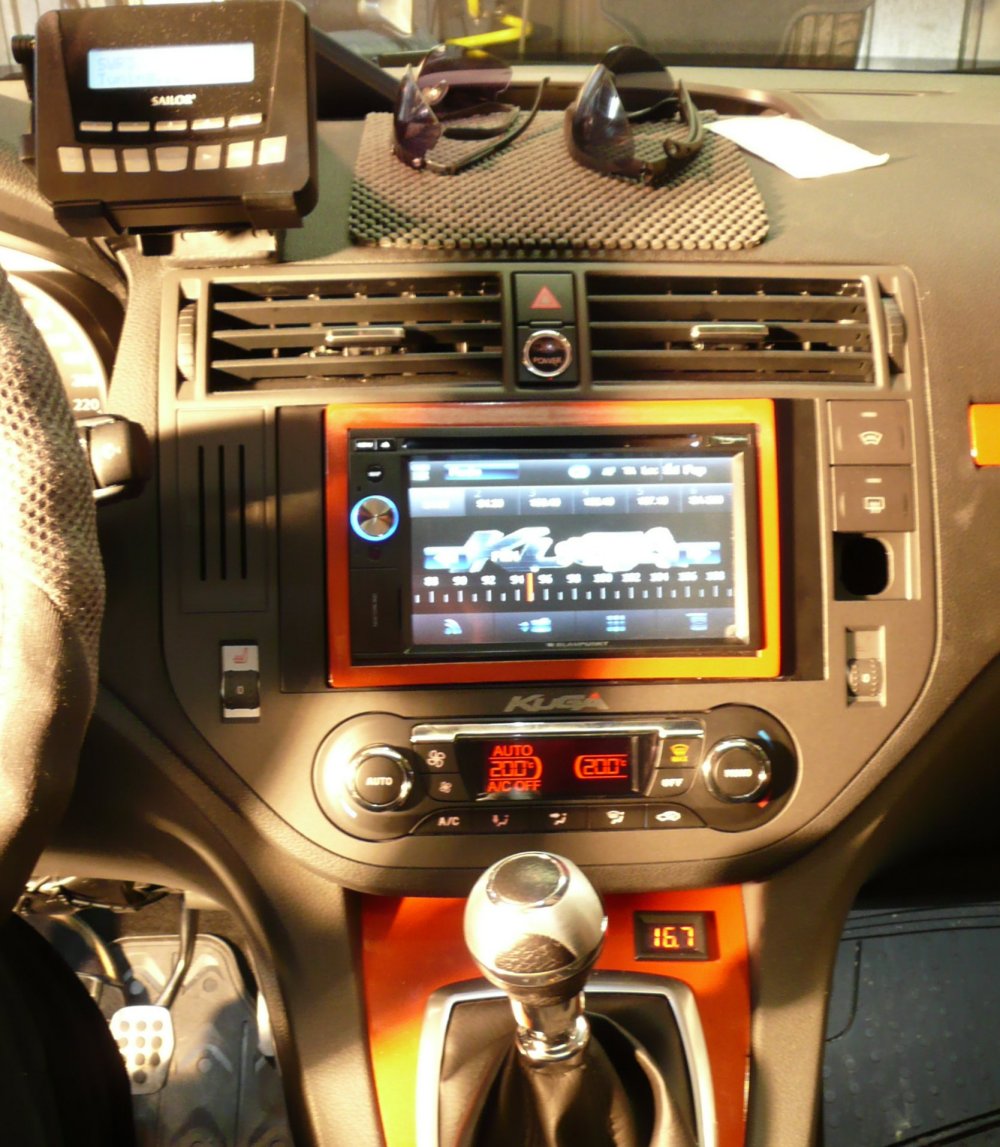
17. black radioframe from Ford Focus / C-Max September 2012
Unfortionately the original radioscreen of the Kuga 2008-2012 is just available with asilver coating. For my taste there should be an option
in black. I have seen a black one at a friend in Munich, he had the frame covered with foil. Because foil is not thus my thing, I bought me
some black varnish and painted the frame black. Pictures to be seen on top.
Then I was on the move with my neighbour to buy C-Max. On the test drive I noticed the black radioscreen of the car. After some talking with Kuga
friends, I have bought a C Max radio frame (black) and inserted it for testing in my Kuga. The frame fitted precisely. Then I acquired of course
the operating instruments for front and rear window heating and in order to make the change perfect I also fitted the ESP switch. What I didn't
alter was the automatic climate control unit. As the price of about 350 EUR, ...... no, that somehow expensive. But my friends who had altered
their radio screen in the meantime a black Focus radio screen were very watchful. We 'shot' a black climate control unit at an auction platform.
The silver screen of the Kuga air-conditioners dismantled within seconds and fitted the black screen of the Focus AC device.
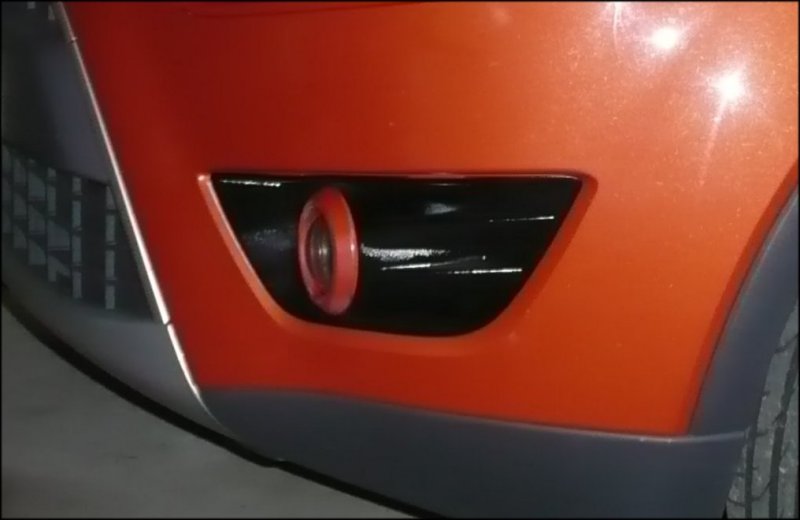
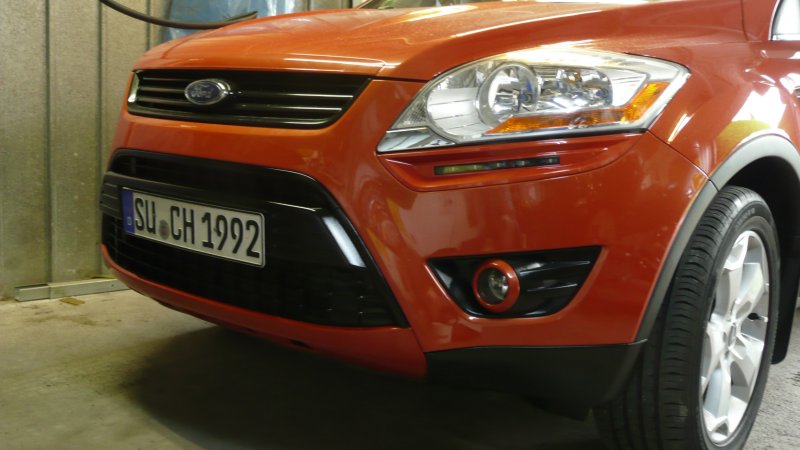
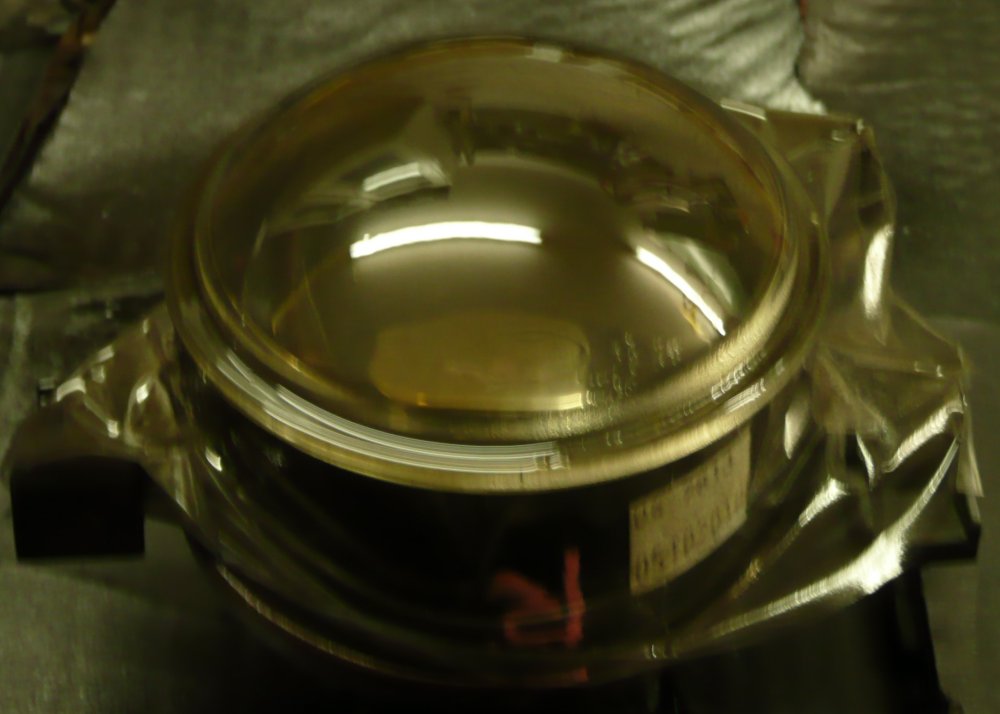
18. Kuga fog lights February 2013
The Kuga fog lights are in my opinion some better 'tea lights'. They do not project the expected additional light on the
road in case of need, their brightness is simply undersized.
Now I resolved to adapt the glasses of the foglights something, speak a weak hue with spray. Furthermore they receive instead
of 35 watts H8 bulbs, new H11 with 55 watts. Now don't start a discussion whether this is permitted / legal or not. In accordance
with the law it is allowed to have your fog lights on in the case of misty weather only. How often do you have your fogys switched
on according to the rules??

19. turning signal tinted February 2013
The turning indicators positioned in the mirrors look like cheap plastic. After now a touch of clear
antrazit varnish they got by an entirety elegant and valuable look.
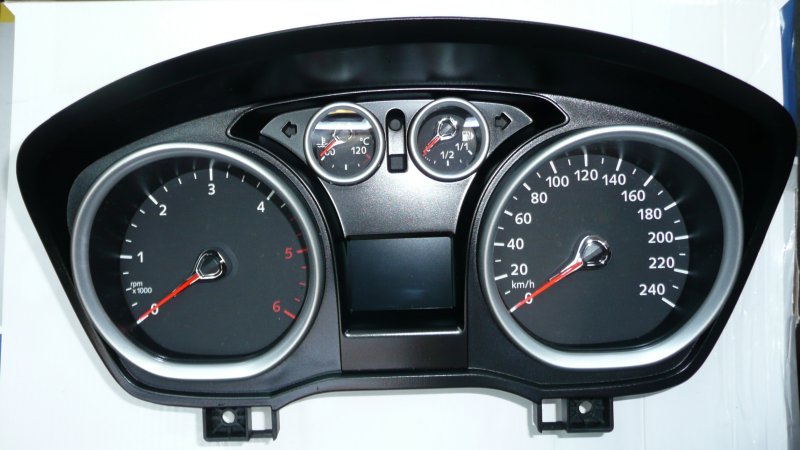
20. speedometer red November 2012
Today I found some tracing paper from my son. Well, nothing special!, yea, but my son is of legal age !! So nothing
to tinker. Or am I wrong? yes I am, but I didn't fiddle around with my son but removed this part of my Kuga
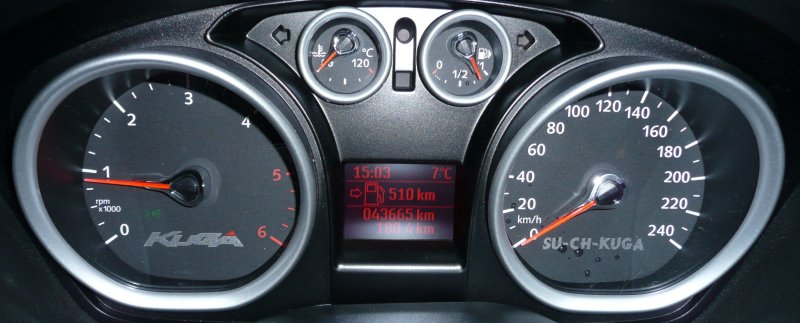
played around with the paper and replaced it with this
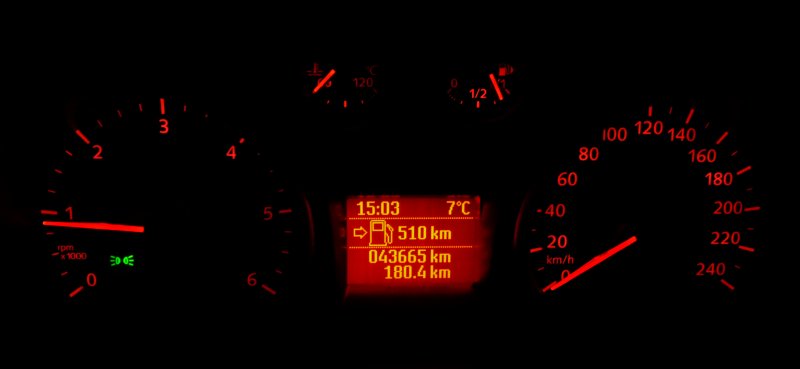
I actually planed a blue light, but it din't come out the way I planed. Other colors to choose from where gree, yellow, pink
and brown. But red had been the best agreement.
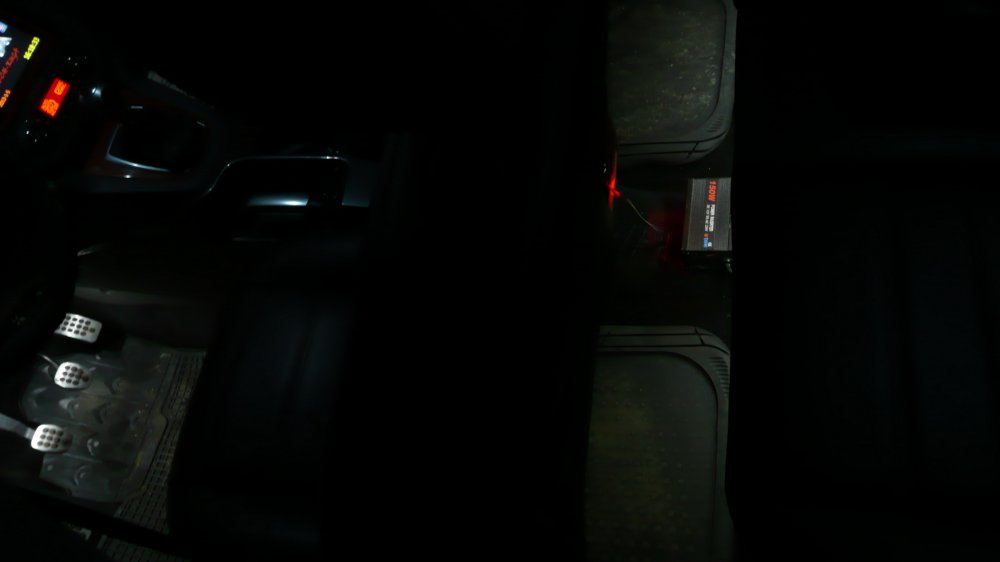
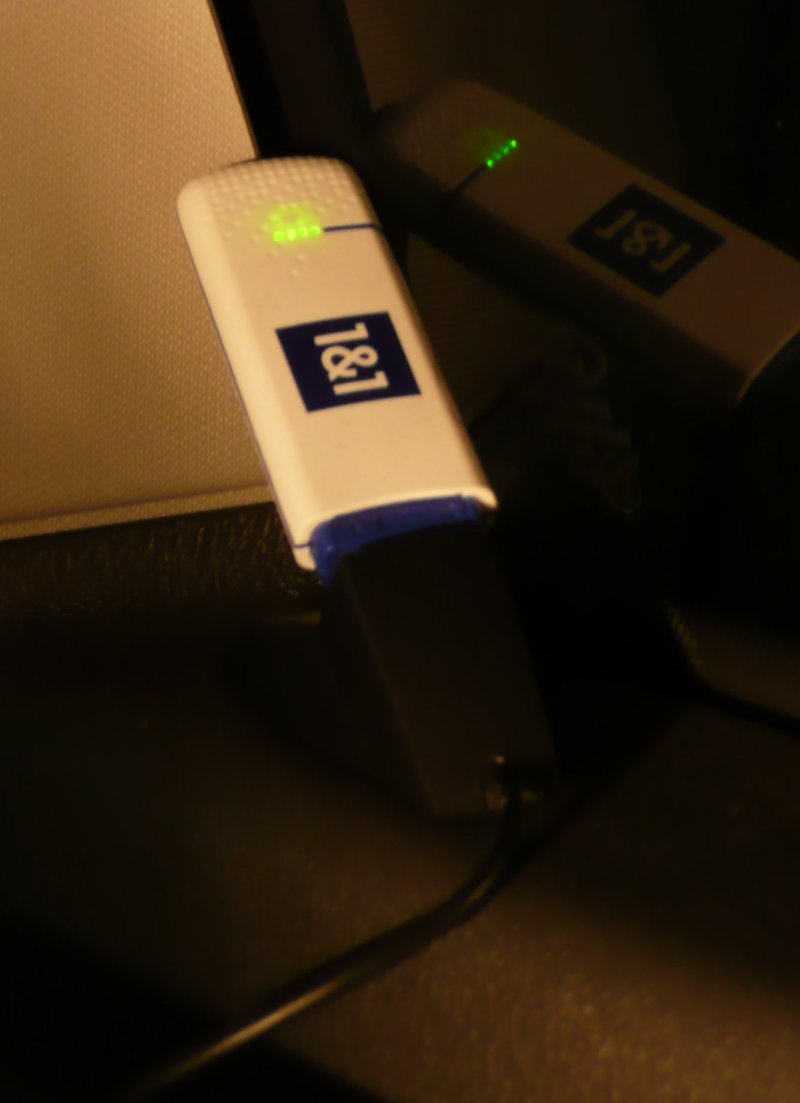
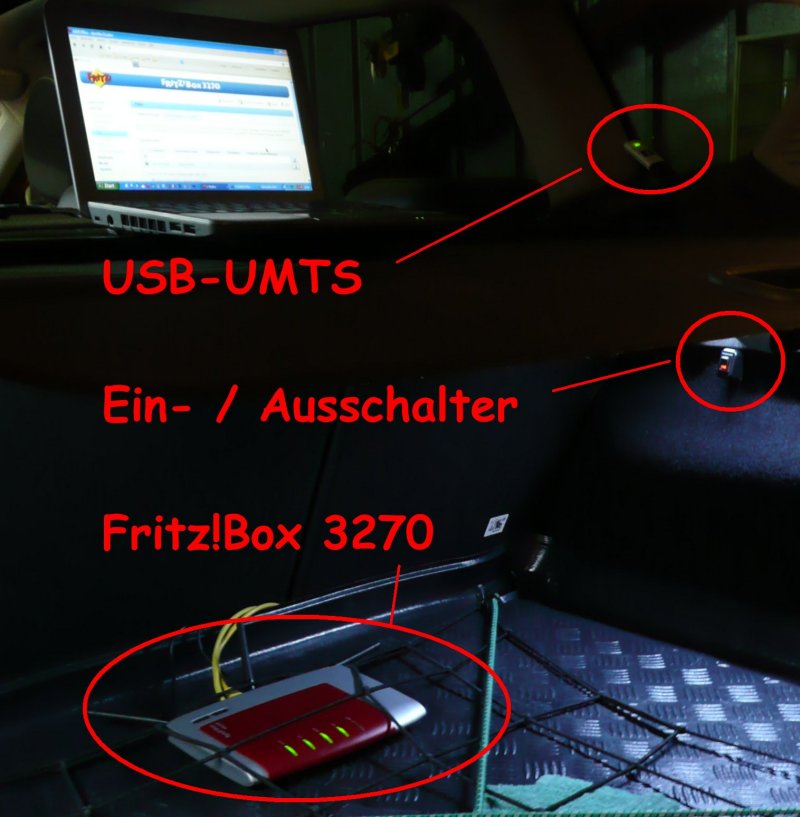
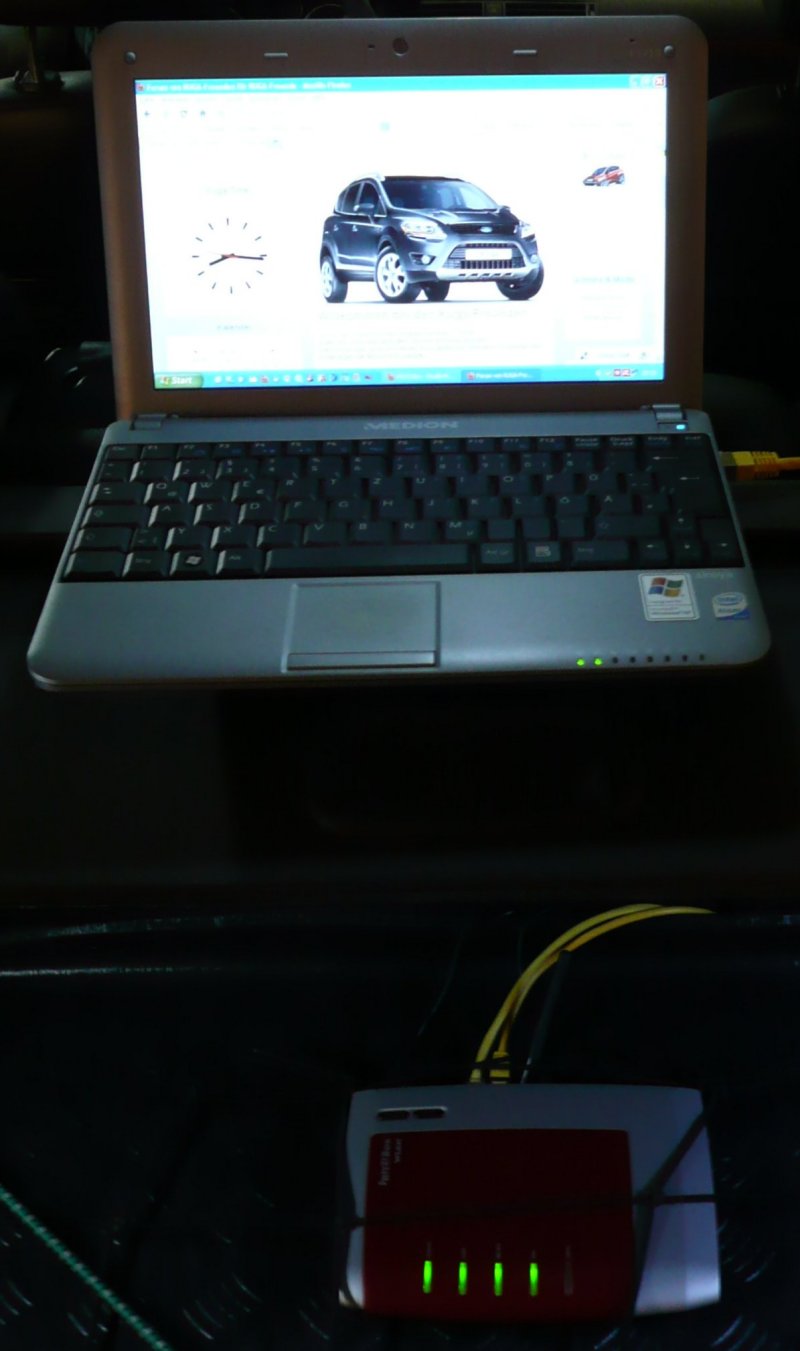
21. WLAN and LAN Option April 2013
Now yesterday it has been the day, I installed a Fritz!Box in my Ford Kuga. Why?? Well, if one thinks about the usage of internet in todays
modern vehicles itself. Or imagine you are on your way to a presentation with colleagues, then they all could make last arrengements with HQ during the
trip. Or think of your kids, they don't necessarily like to renounce on the holiday trip on facebook, twitter or other communities. Or even if you
are alone on a trip and you would not like to have the USB-stick constantly sticking out of your laptop all the time.
Well, in any case, absolutely a rather comfortable matter, however, absolutely no must.
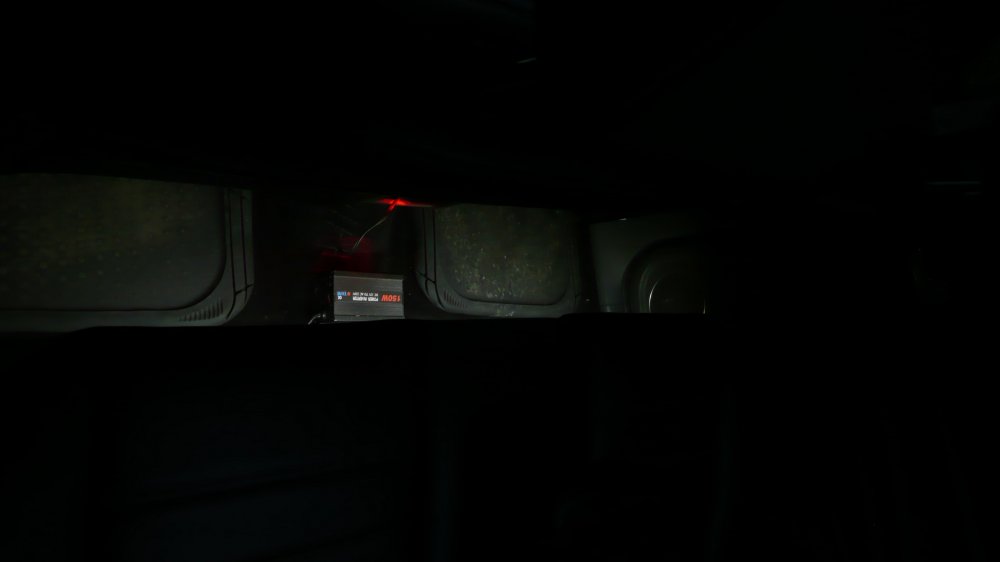
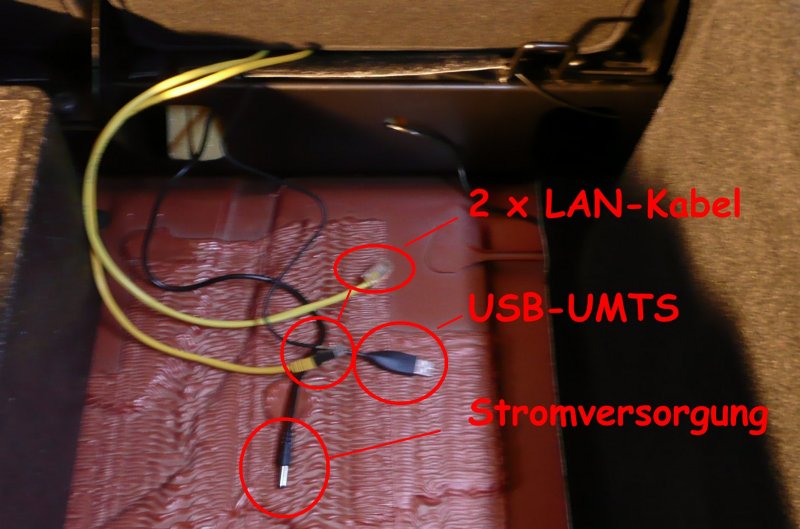
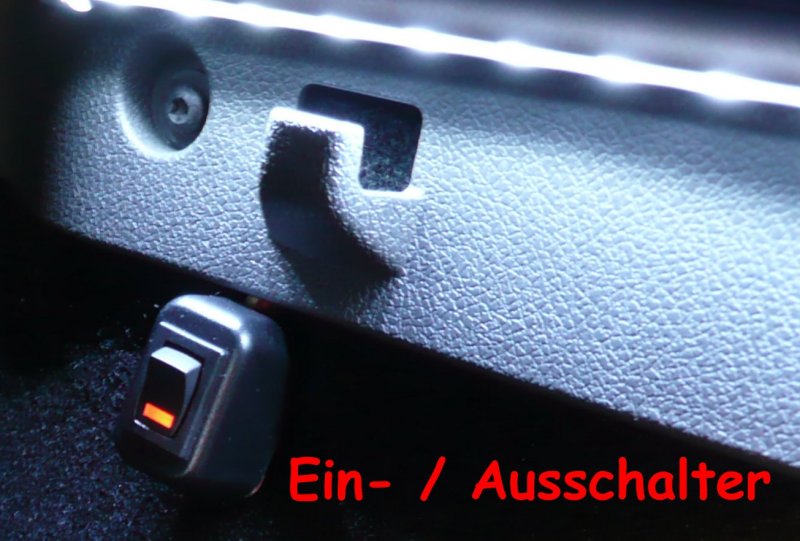
The installation itself is rather easy, I connected the the power for the Fritz!Box to the cables of the boot outlet. Of course with a
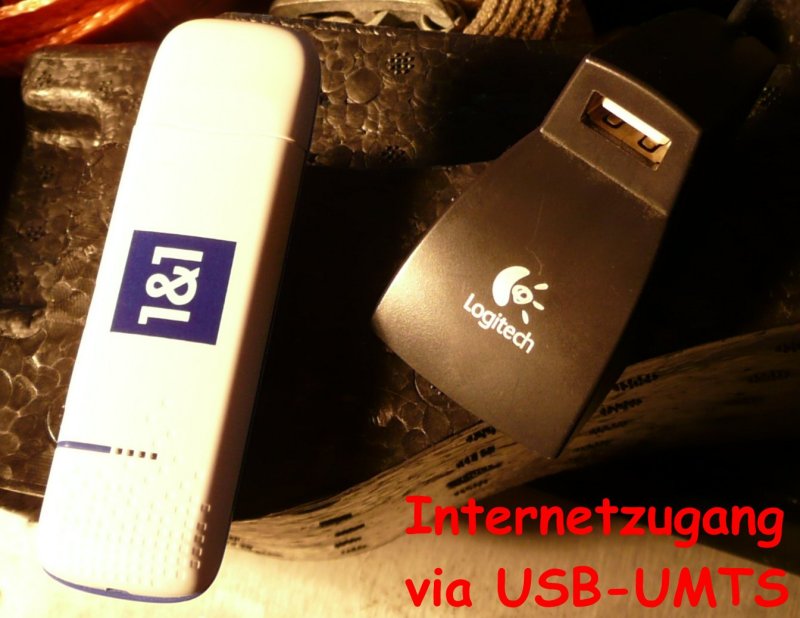
protection fuse on the plus cable. Afterwards I fitted the cable on the boot ground up to the back row. The USB-HTML/HSPA modem fits very perfectly
in the small right side window. I laid the USB connection cable right down the side and also up to the boot ground. Beneath the back seats I
placed a long and a short LAN cable (short for passengers seated in the back row and long for the front passanger seat) This way it can be
guaranteed to get access to the Fritz!Box should there be problems at a time.
The internet access functioned right away. About the USB-stick data capacity is compareable with the 6000 DSL high speed at home. Even in the
closed garage the receipt was flawless. Now I'm questioning myself whether it would be possible to connect an external hard disk capable of LAN
to the Fritz!Box thus films and music can be heard / seen on the Blaupunkt NewYork 800 radio. The efficiency of the internet data capacity would
admit even voice over IP (VOIP). However, this is another subject and is to be checked at a later time. The right position for the Fritz!Box is up
to each one of you installing this Ford Kuga option. I will position a fixture on the back of the back row. An other consideration would be a
place in the inlays of the boot ground. A better ventilation here might be an advantage, but the device would be unvisible from the outside at
any time.
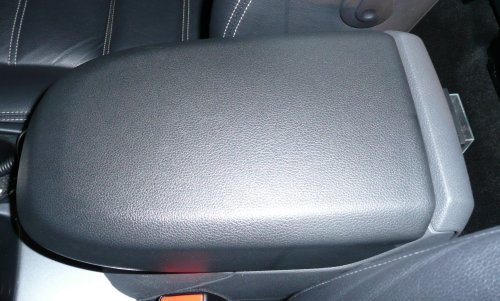
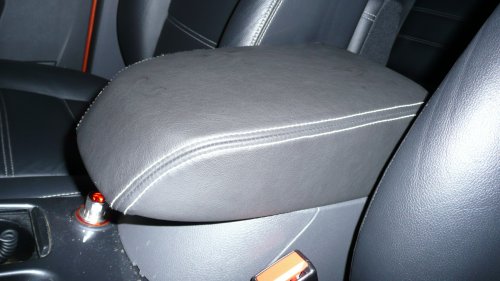
22. leather covered armrest March 2013
During wintertime there was almost nothing to work a round at my Kuga I. As I took a look at the rear armrest, I actually noticed that
the rear one had a leather covering. But the one in front did not. So I decided to change this major shortcoming.
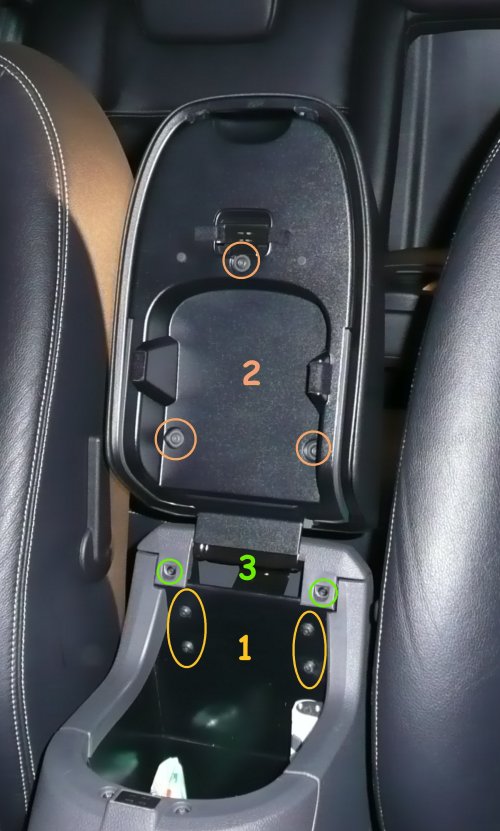
It actually is realy easy to take out the front armrest. When opening the center armrest you will notice 9 screws on the inside. It
makes sense to remove the entire armrest, due to well hidden screws. Therefore, first remove the two screws (3) holding the rear of the
center console, then clip the rear console off. Then unscrew the 4 bolts at the center front (1) and remove the entire armrest. The next
3 screws (2) are located directly at the bottom of the armrest itself. Once you have removed these, the lower panel, as well as the
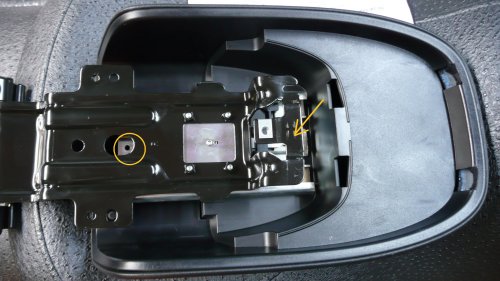
back cover, which is visible when the armrest is pushed forward, can be removed. The slide unit of the armrest is fixed with 2 small Torx screws.
To remove them, it is necessary to take out the one in back first (circle), then move the unit so that it shows the hidden screw in front
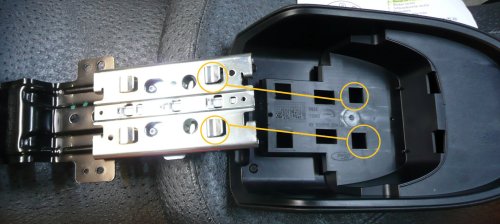
(arrow). Now, the entire slide unit can be removed by pulling backwards. There are no feathers or other parts, such as brackets or similar
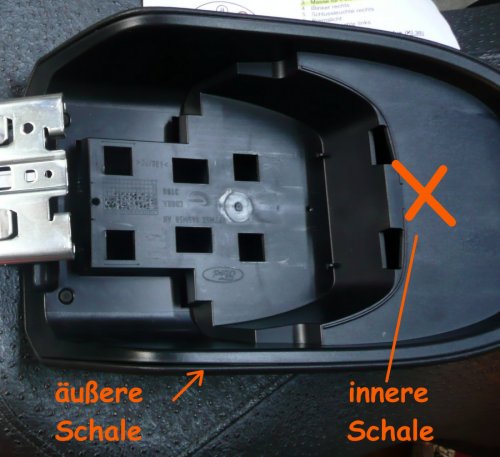
to pay attention to. Thus, you now have a two-piece center armrest in hand and leather coating can be applied. Would like to separate the
two parts to allow the coating to end in the inside of the inner shell you should be carefull. Unfortunately I could not find any brackets
on the outer or inner shell.
The new terms of the armrest not only looks simply great, but lets the entire front become one. The sliding mechanism is retained.
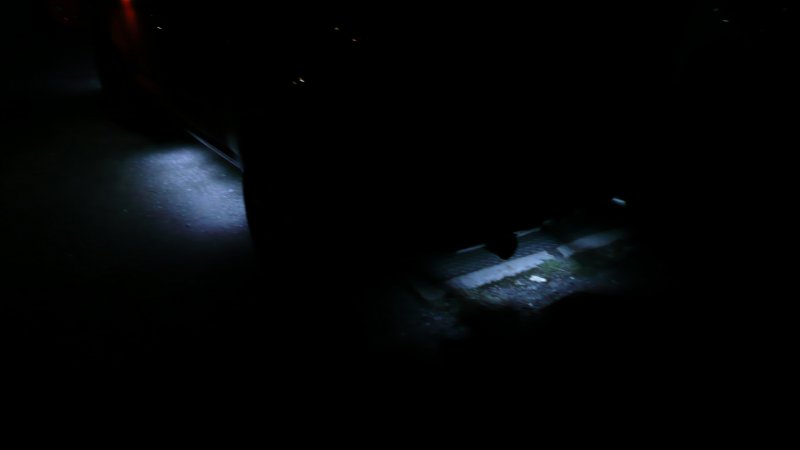
23. Puddle light extentsion May 2013
The winter was rather long, nevertheless the Kuga-friends came up with the idea to extend the puddle lights of the Kuga. How it looks like? Certainly
it depends on ones own oppinion, thumb up or down, but an interesting work. Certainty. After completion you will see some pictures and of course get the
tips in addition.
So, now it's finished, just on time for the 2. international Kuga Treffen the enlarged sphere lighting is completely installed and,
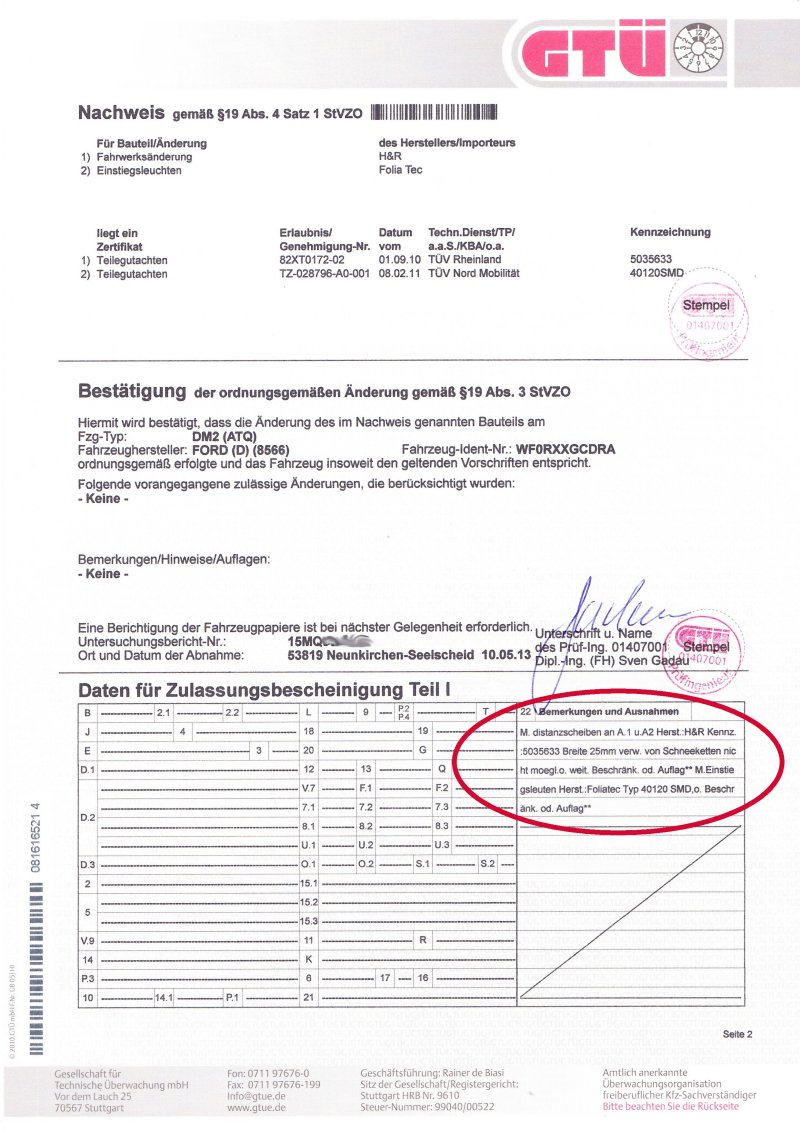
yes, and I got the approval by the German TÜV (automobil safety commission) !!
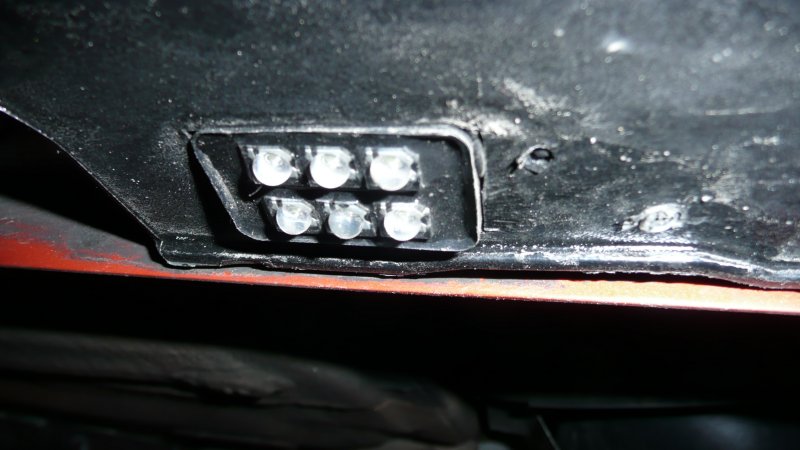
I bought the underflor LEDs by Foliatec. The set contains 2 x 4 lights LEDs and every LED segment has 6 single LEDs.
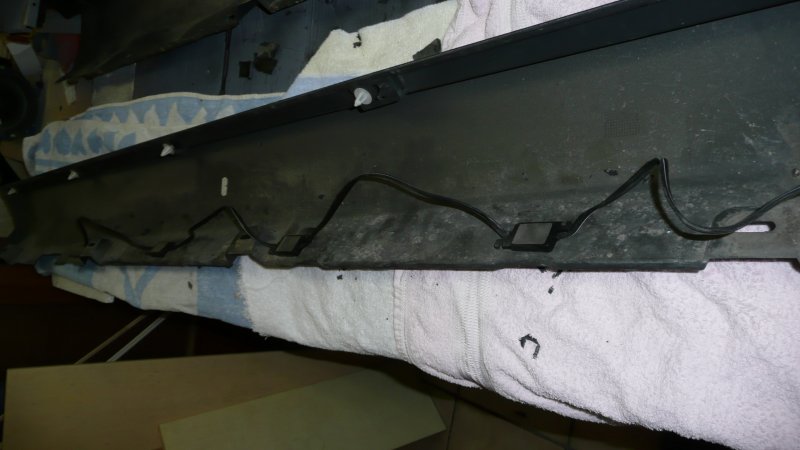
According to the assembly instructions, the lights should be mounted vertical under the rocker. Due to the plastik rockers of the Kuga
its actually no problem to fit the elements simply with a screw. Nevertheless, the cables on the underside lie open and can be torn off by e.g. branches.
Hence, the Kuga friends created the In-rocker-solution: The LEDs are mounted on the inside of the rocker and are save.
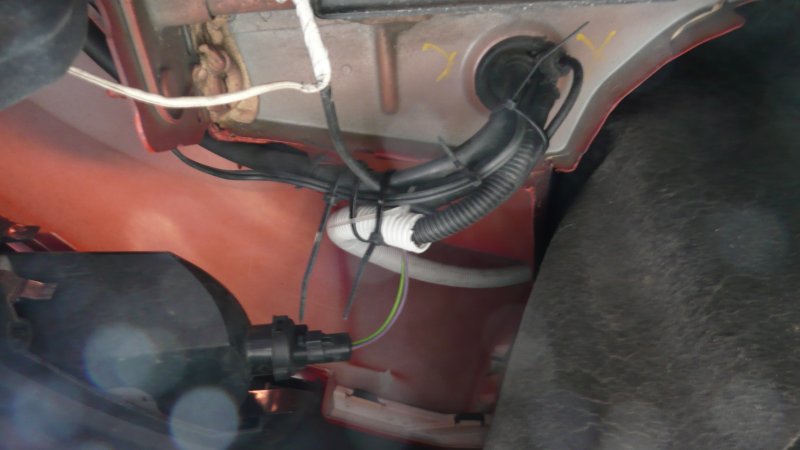
I installed the power wires above the wheel arch to the trunk and entered from the boot ground at the rubber-cuff the inside.
To connect the wiring to the interior lighting is quite simple.
I mounted an other set of LEDs in the front bumper and connect the wiring only for show purposes with the interior lighting. Also the rear
got some lighting. Here I connected two LEDs for the sphere lighting and two for the open hatchback with the interior lighting.
The enlargement in pictures: Inside view, LED, rubber-cuff, look at night, directly after installation, automobil safety commission approval
|
24. Programmiing via OBD-Interface PART I May 2013
Thanks to spanish friends we could carry out some changes on the the control units via OBD interface of 2 Kugas.
But step by step.
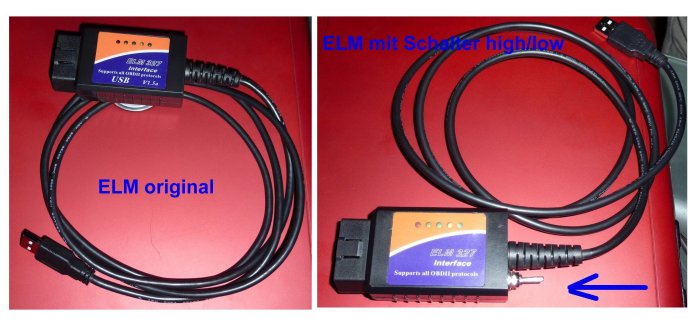
An OBD plug is necessary read out the vehicle data. For this reason I have acquired an ELM327 in an auctioneers.
In midd May I had first tests. It was a matter of just selecting data, as for example
rounds/min, boost pressure, injection pressure, suction temperature, acceleration values, and what ever else had
been available.
But to programm anything we had no time yet, first of all the preparations for and then 2. international Kuga Treffen
Germany had first priority.
But now the time had come, we were eager to get some programming done. Unfortunately, this acquired ELM327 was not
able to carry out the changes we whanted. The CANBUS has different frequencies which the ELM did not recognized.
Here spanish friends gave us a hand. Thank you to Oscar and Andres. With spanish instructions
necessarily) they informed us, to connect a few wires and a 3-way-switch and that's it. Now programming is possible.
Oh well, with the modified interface it really it realy did work out!!
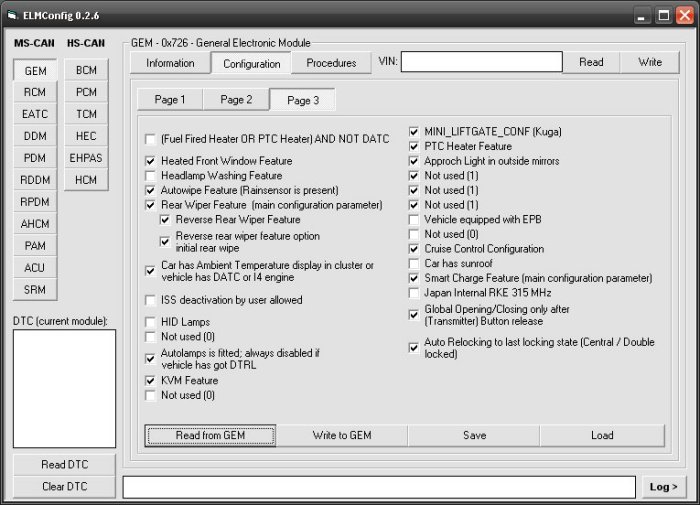
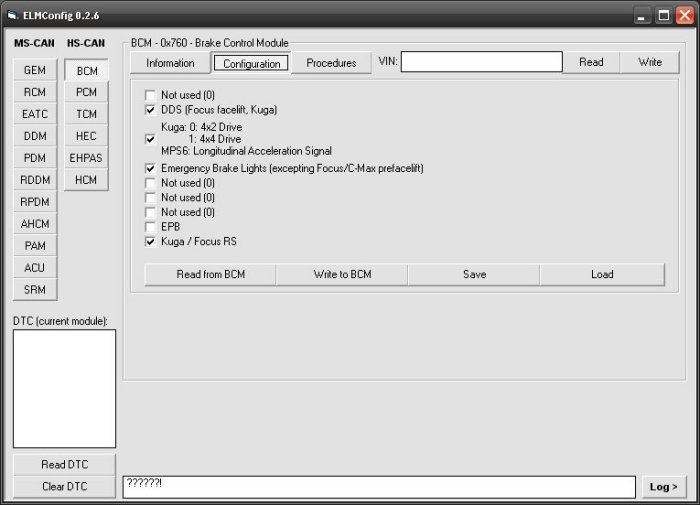
We were able to make some changes on 2 Ford Kugas: the automatic door closing on take off, deadlock (double lock) with
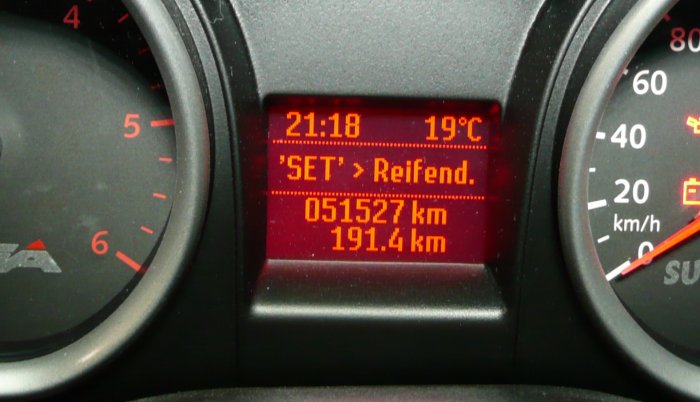
one click, opening just the drivers door with one click, another click opens the remaining doors. The DDS (tyre pressure
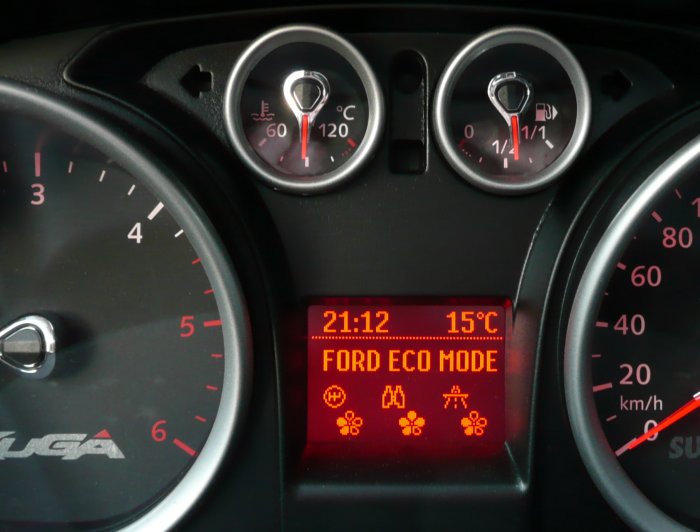
control) could be activated on both (the 2008 and the 2011) models. The Eco-Mode function was only working on the 2011 model.
Here we do question ourselfs whether a software update could help the other Kuga, or did we miss a check during our changes.
However we were able to add the green arrow on the 2008 Kuga, indicating the eco gear change.
There are still several possibilities to make further changes, but here the tip: not everything works out and mistakes
lead to engine failure or other mistakes.
If you should imitate my work, I will give NO warrenty! The changes occur on own risk!!
Here a few pictures of the changes.
|
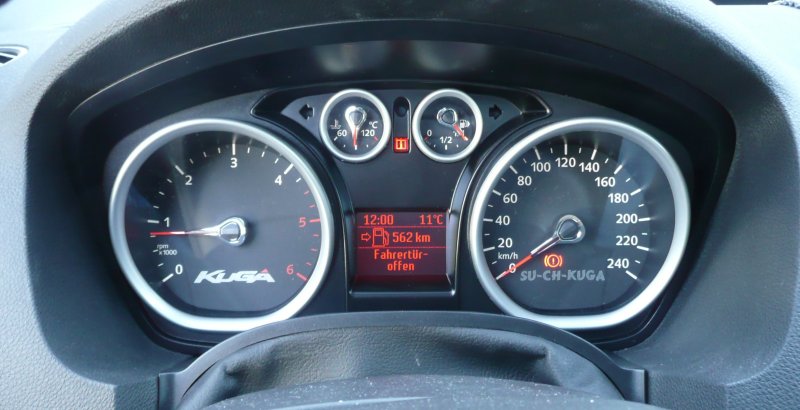
25. Programming via OBD-Interface PART II June 2013
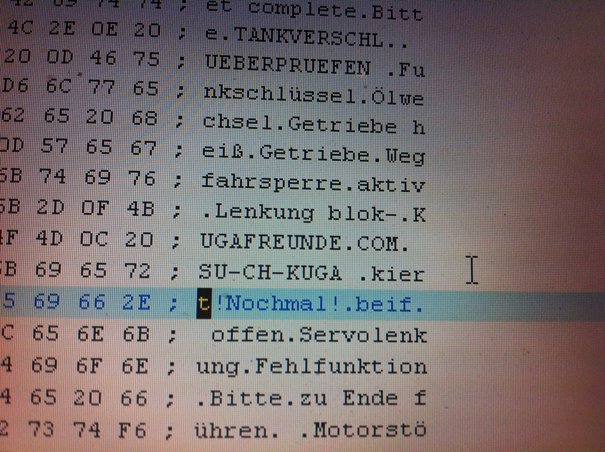
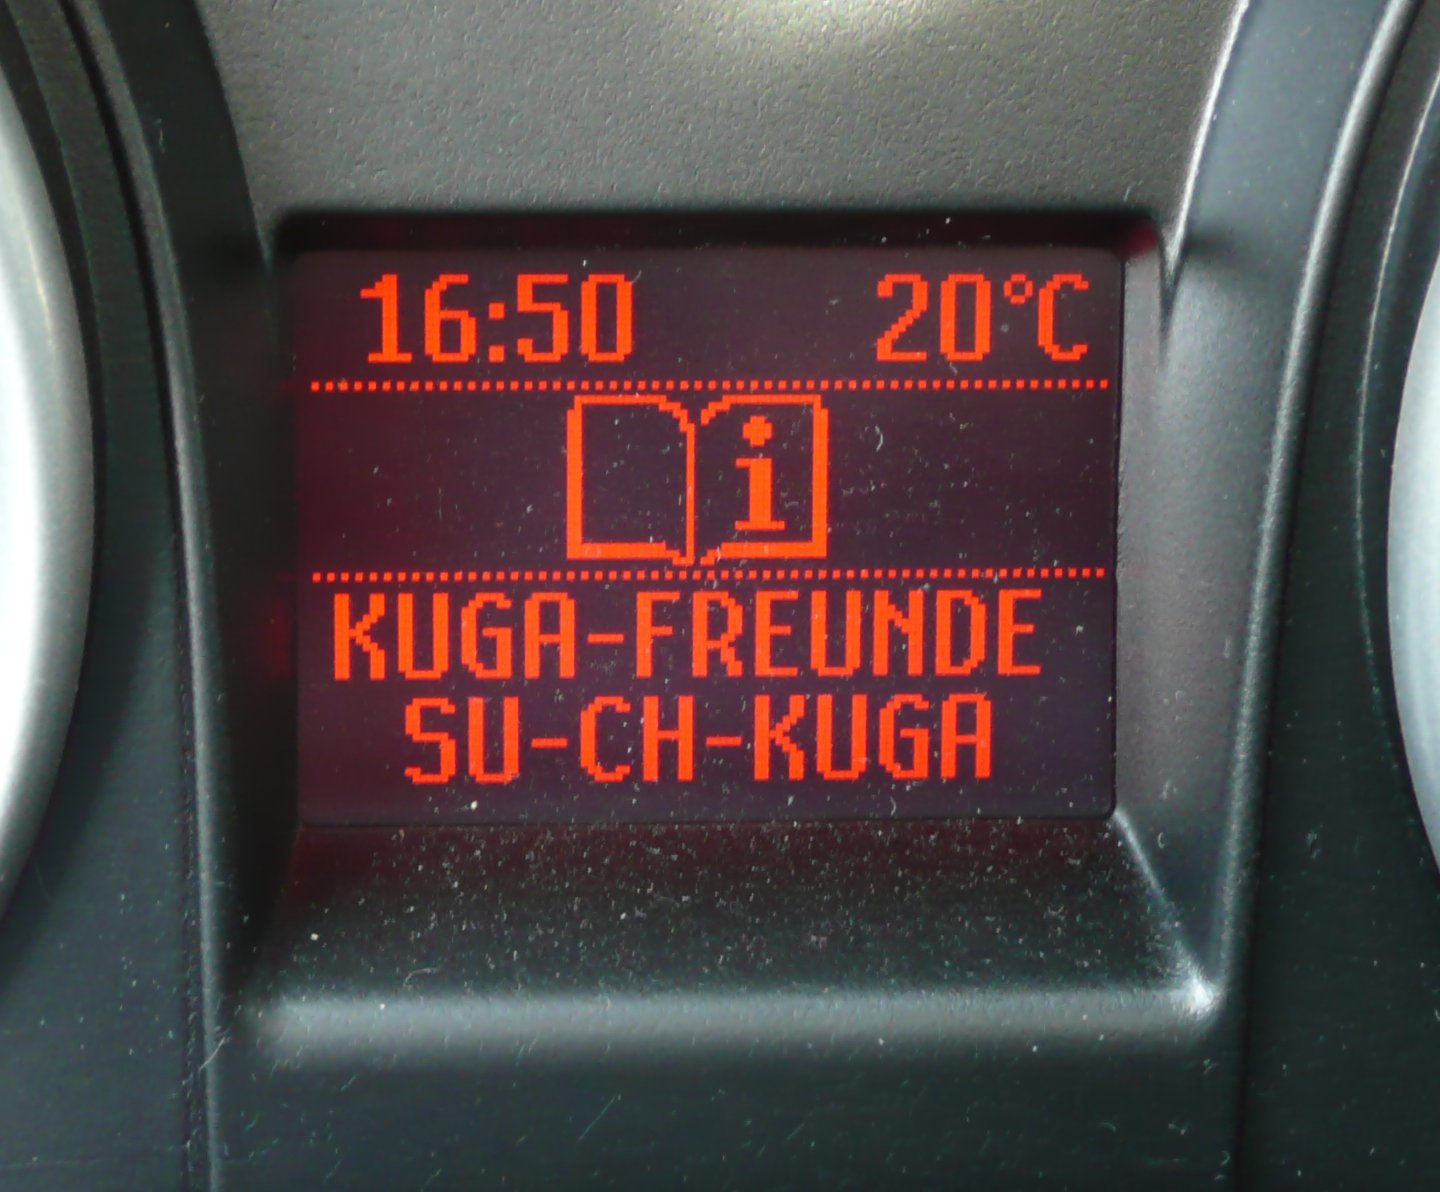
I got an inspiration from my Spanish friends. Somewhere I had seen the IC of an Kuga which indicated in the display not 'open
driver's door' but 'Experience Oscarboiro'. I would love have this programmed in my SUV, the display indicating my name.
This serves of course the purpose of passiv the theft protection, because the thief necessarily pays no attention to the
display of the IC. Therefore just passive theft protection, but at least better than no protection. And it is naturaly
it also is a nice gimmick.
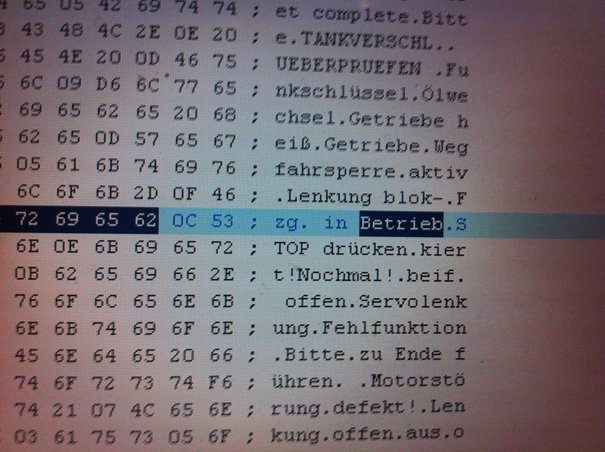
But where should I start the programming? I got in touch once more with the friends from Spain. They explained to me how I
should start and where I find the data. Well, said and done. Looking up the file of the IC and opened it with a HEX editor.
Yet a picture of the display with ignition on and open drivers door. Now I had to find the text from the display in the HEX file
and change the wording according to my wishes and store the file again.
Now it was time to try out the changes I made, I tell you, it was a rotten feeling. What is if something goes wrong? What would you
tell the Ford dealer when bringing in the Kuga? But no risk, no fun.
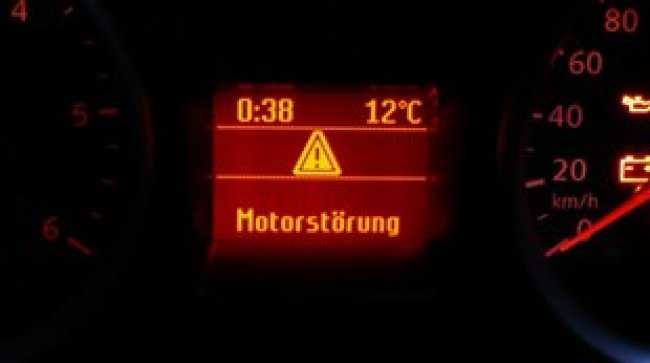
So OBD plug connected, the transfer mode set and hit the start button. The transfer time takes about 15 to 20 minutes.
The programme ran through, fantastic I thought until I took a look at the display: ENGINE FAILURE!! No, this can't be!!
So I called my friend from Spain by Skype and explained the situation. He very quiet: That is normal, just delete the error
message. Well, I tried and really, no engine failure on my display, the night was saved!! It was at least 00:45 o'clock.
These changes were carried out with a modified ELM327. If you would like to try it with the standard model I cannot say if it works out.
If you should imitate my work, I will give NO warrenty! The changes occur on own risk!!
Here a few pictures of the changes.

|
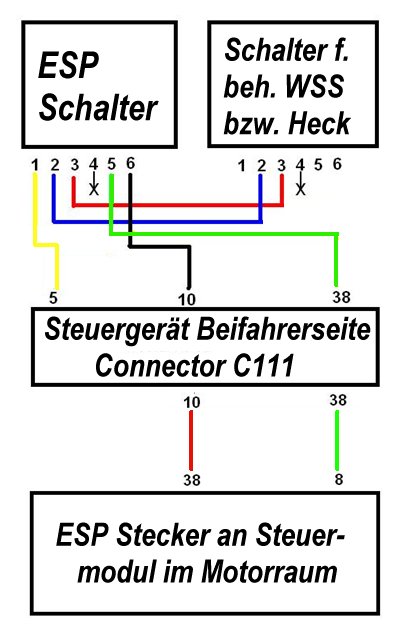
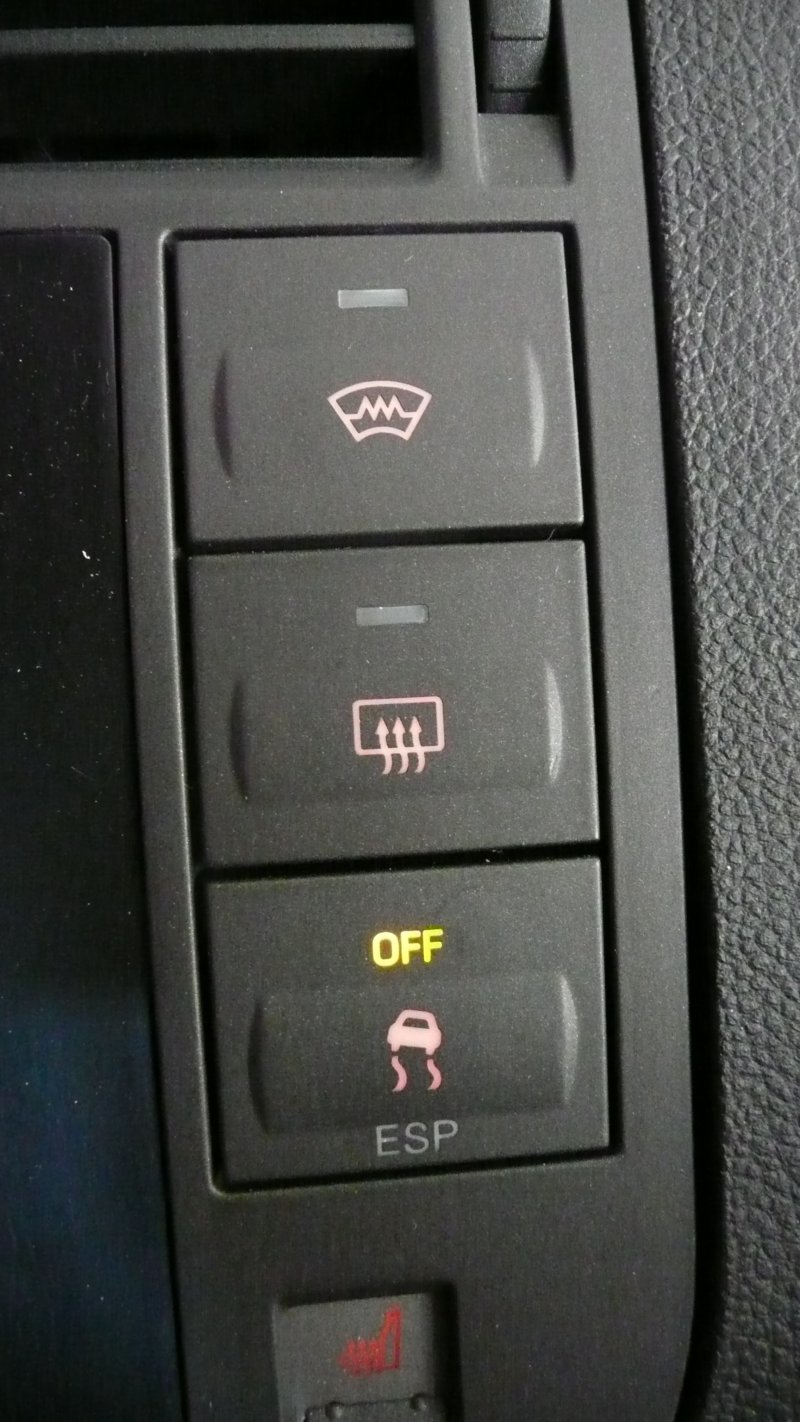
26. ESP on / off via switch November 2013
Access to the ESP on the Kuga is only possible by using the BC (board computer) menu Odometer Cluster. This is, particularly during the
winter time, a point thats not acceptable, because this feature can be selected only when you come to a complete stop. There
must be a solution to integrate a switch in the radio-frame.
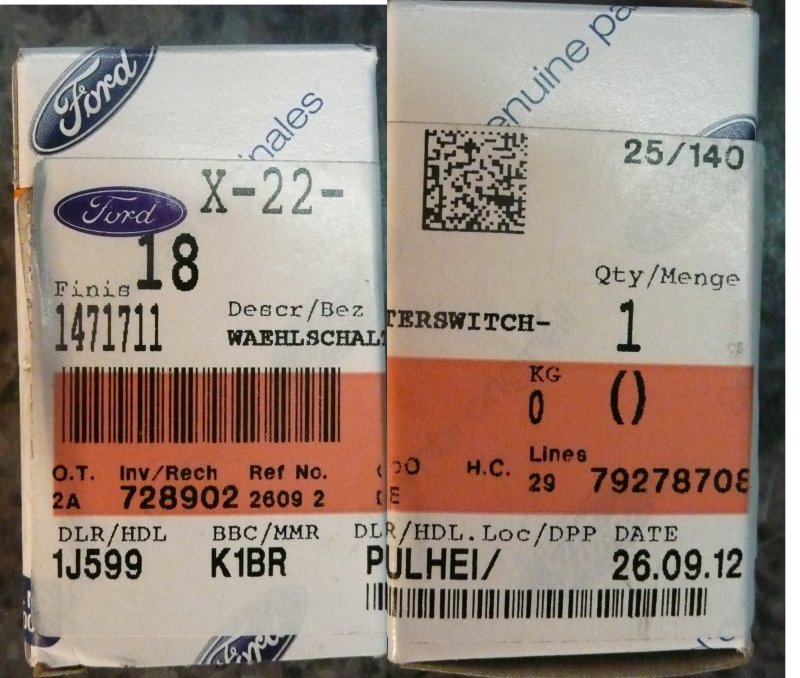
After the installation on/off switch connect lighting wire to the windshield or rearwindow heating switch modules. with the other counters 'abzwackt'. One can take oh yes, the Schlter for the ESP of the Focus, C Max or transit.
If you can get the plug at your local junk yard it OK, but other wise, you got to build your own one. To buy one would
be a very expensive option, as you can only get the entire wiring harness.
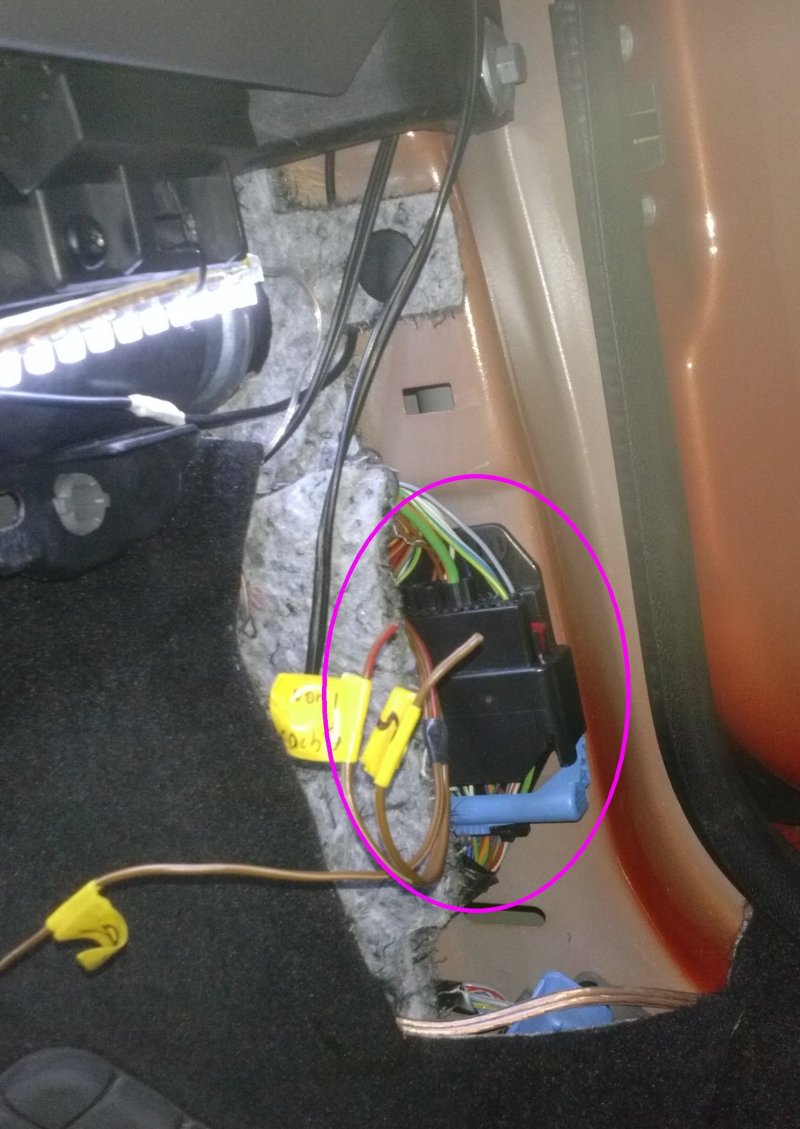
As is the lighting is connected, the remaining three wires have to be laid in the footwell of the passinger side.
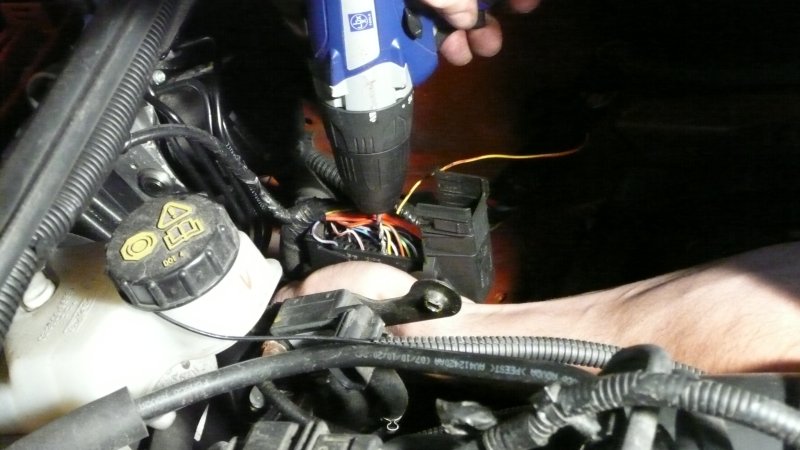
There they are to be connected to the ESP-Modul behind the lower cover of the lower A-Pillar. Further on we now have to
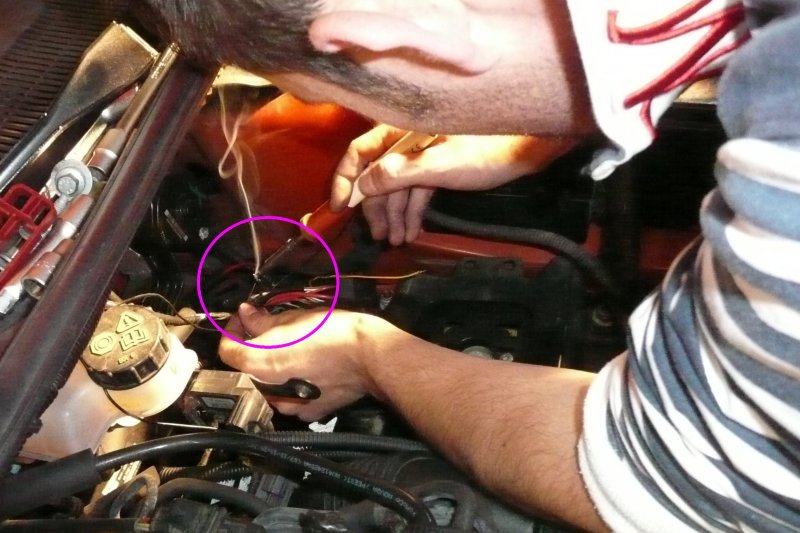
lay another 2 cables in the engine compartment. Here the main work is to be done. The entire battery box
has to move out. This is the only way to have access to the ABS/ESP plug in the control unit. Remove the plug carefully.
The two cables have to be inserted into the right positions. This is only possible, if the plug is disassembled, by
pulling of the red cuff. Now two small holes have to be drilled in the cuff, now shove the wires through, afterwards
move them through the blue gasket and stick them into the right jack. Finished allmost. Assemble everything and you are done.

Meanwhile more and more Kuga owners can switch on and off the ESP while driving. This shows a
survey conducted by the Ford-SUV-Freunde. Mostly all vehicles got a software update by the dealer. Other forum members could not say
whether or not they had this function before.
In any case, meanwhile this option can also be programmed by using the ELM in the HS-CAN. Though it is not the ultimate
solution, but absolutely a not such a time-consuming one. In my opinion the best would be to have a on and off switch
to have access to the ESP module in the engine compartment. The ELM solution is still taking your concentraintion off the
traffic and to the cluster to change.
I would like to leave it up to you to decide on one or other variation.
|
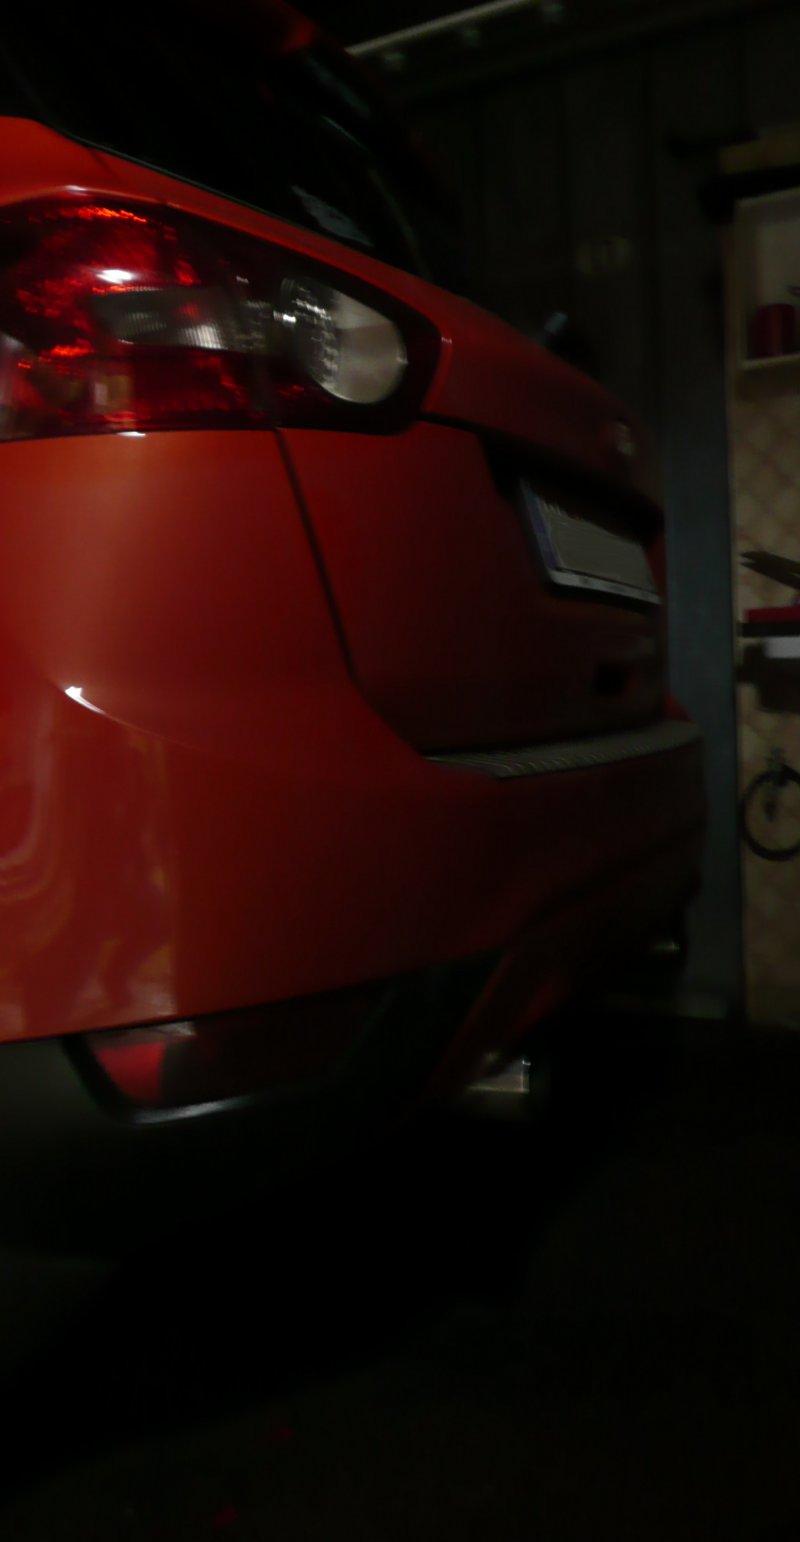
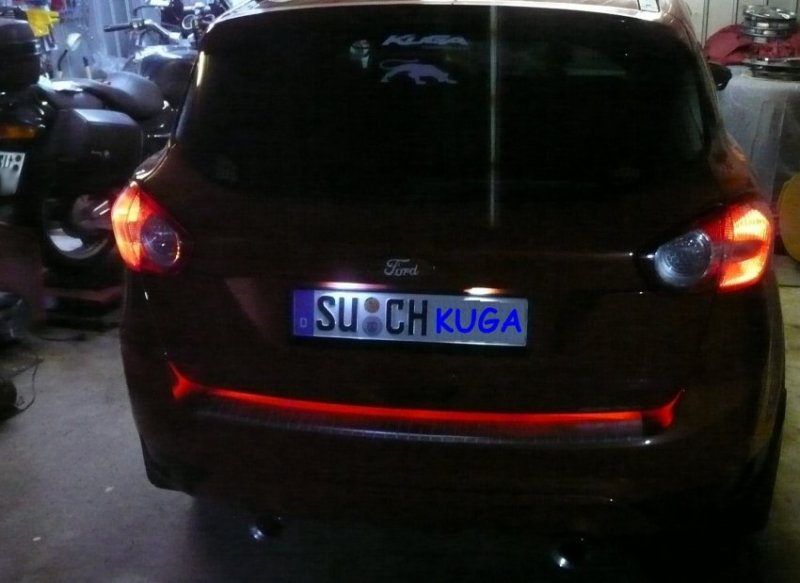
27. LED rear light November 2013
Nevertheless, tuning sometimes comes a little bit too short, especially during the summer months. And when it gets dark early and cold
outside there a bubble again with ideas simply to jump out. That was the way it happened in this case. I had a 90 cm LED-Stripe laying
around, for what I bought I don't even remember anymore.
In any case, I had them in my hands and the Kuga beside me. It certainly looks good when I would manage to fit the LED as the 3rd.
stop light on the hatchback. Unfortunately, the connection possibilities there are so exciting and then there still are the watchdogs
(police). And a LED stripe on the back would be an eyecatcher for them as it is not allowed in Germany to add any safty lights!!
I laid the LED strip on the rear bumper and fiddled arround with something else in the rear. As I had finished I reached for the LED
but where did the LED go? ?? Ah, there are the power cables. I pulled and the stripe came out from behind tailgate. That inspired me
to fit the LED beneaht the doorseal at the back. Said and done:
It is not everyones taste, but I think it fits the mars-red Kuga. If there wouldn't be this hurdle, the German safety association
and our racing management with the blue lights on top. As I said before, there is no possibility to add any safty lights that are not
approved by authorities. Because my Kuga is nearly 3 years old I have to get a MOT certificate shortly. Lets see what the inspectors will
tell when I face them with my idea.
So friends last Friday I have been at the SAFETY STANDARDS AUTHORITY / GTÜ. I got the popular badge. No complaint concerning the dark
turning indicator glasses or the dark fog lights (bulletpoints 18 and 19).
But not with the LED light I had in mind.
I had the LED-Stripe in my trunk, ready for a demonstration. I explained them what I have in mind and laid the LED at the mentioned
position, closed the back door and turned on the lights. Yea, it looks very nice, BUT there is no way we can allow you driving with
that light as it has no design approval.


So that's it. Just in case there should be an accident, think about the discussion with the police and the insurance, that's something I
don't need.
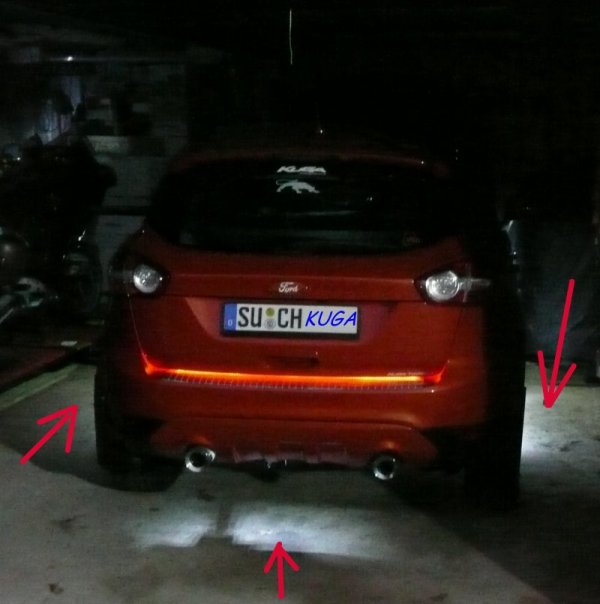
But I still installed the LED. I felt free and fixed them to the sphere lighting. As I already extended my puddle lights (bulletpoint 23), it was
very easy to adapt the power cables. Now unlocking the Kuga or opening the doors, will automaticly also light up my rear LED.
On the photo you may see the sphere lighting switched on (arrows)and the LED.
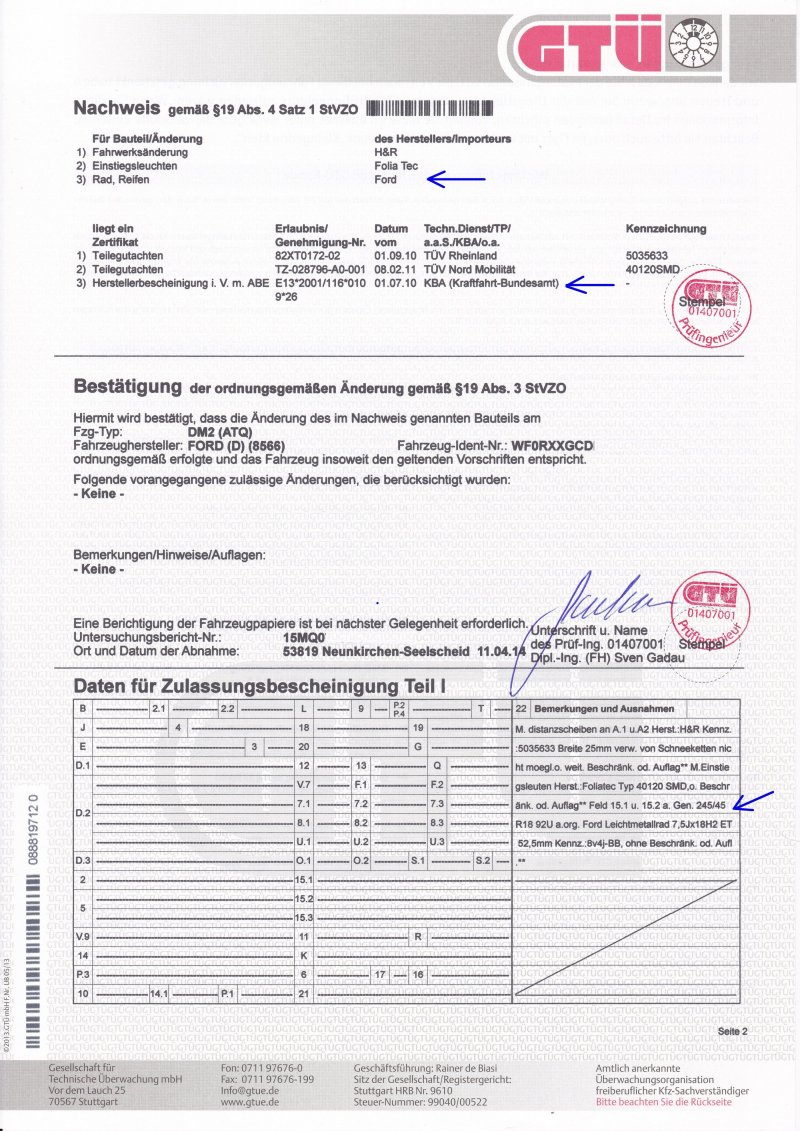
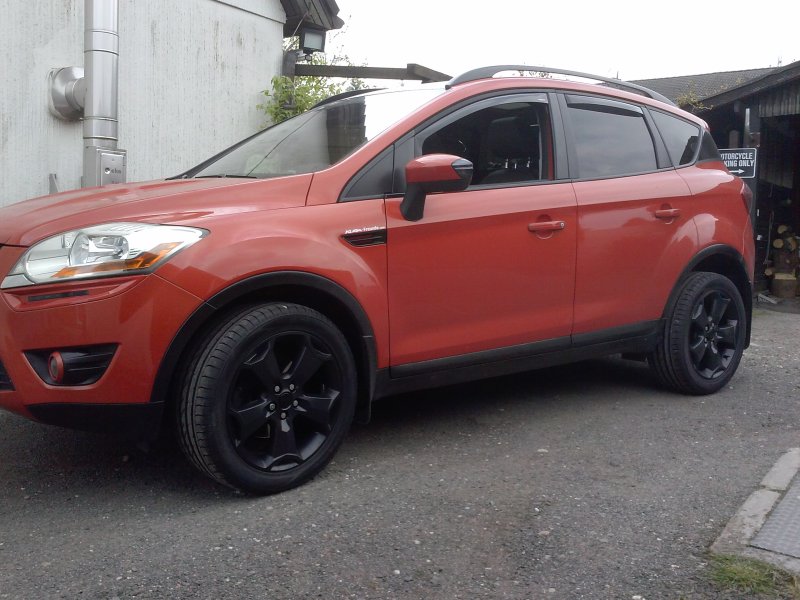
28. original alloys powder coated and 245-45 tires March 2014
Last month I had my original alloys powder coated to matt anthracite. They now do really look much better on my Kuga.
In order to give my car the perfect look, I asked Ford in October 2013 to provide me an OK to mount 245-45-18 tires on the original alloys.
After a discussion over months I finaly got the desired paper.
In Germany you have to get the OK by the SAFETY STANDARDS AUTHORITY, so I presented them the OK by Ford and aked for their seal. They stared
discussing whether or not I had original alloys! They I presented the bill for the power coating and finaly got the permission. Thanks guys!
29. new colored Kuga September 2014
Hi all, it certainly has passed quite some time since my last Kuga modification. But I am planing a new one.
I like to have a 2 colored Kuga. Taking a look at the currently applied colors, what do you think which color I will add?
Yes, you're right it's black.
I just like to reveal this much, it will not just be the hood.
Stay tuned a read more about it. September / October I will place some picture to show the result.
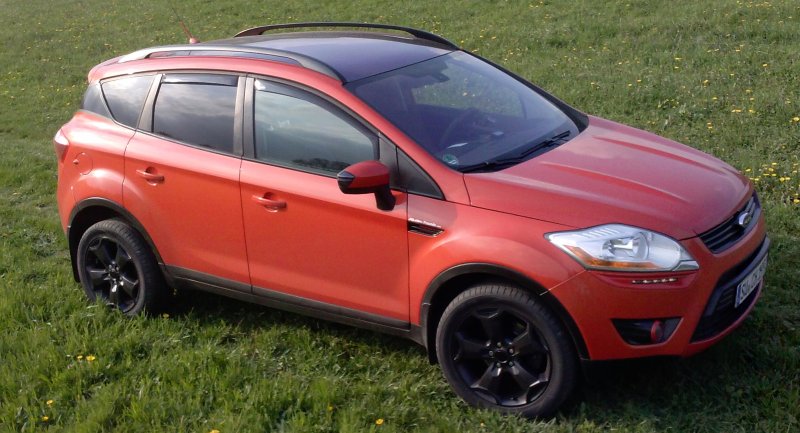 my Kuga as of today 2014-Aug-31 my Kuga as of today 2014-Aug-31
 my Kuga tomorrow my Kuga tomorrow
|
|
|
|
|
|
|
|
|
|
|
|
|
|
|
|
|
|
|
|
|
If you have any questions, please do not hesitate, just send an
E-Mail
You will find more informations, manuals, help and suggestions right here:
Impressum
Html Code Für Besucherzähler since 2013-10-01
since 2013-10-01
| | |